At Champion Services, we understand that the decision to upgrade your heating unit is an important one. It’s important to weigh the pros and cons of investing in a new system, as well as consider all of the benefits it can provide for your home.

In this guide, we’ll discuss the reasons why you should upgrade your heating unit, what kind of benefits it can provide, how to go about upgrading your system and more. We’ll also provide some helpful tips on how to make sure you get the most out of your investment.

At champion services, we have decades of experience in providing top-notch services at a fair and reasonable price point! Whether you need HVAC, plumbing or electrical repairs, maintenance, new installations or replacements – we’re here to help. Our experienced technicians are on call day and night, ready to assist with all of your heating needs.

Reasons to Upgrade Your Heating Unit

At Champion Services, we understand how important it is to have a reliable and efficient heating system. Over time, your heating unit can become outdated or inefficient, resulting in higher energy bills and poor performance. If you’re considering upgrading your heating unit, here are some reasons why it may be beneficial for you.

No Extra Protection

Older models of heating units may not have the same level of protection as newer models. This means that if something goes wrong with your system, you may not have the extra protection of warranties or guarantees that come with newer models. This could leave you responsible for any repairs or replacements needed on your system.

Decreased Appeal

If you’re planning on selling your home in the near future, having an outdated heating unit can decrease the appeal of your home to potential buyers. An older model may be seen as an eyesore and could potentially turn away buyers who are looking for a more modern home.

Performance Issues

As mentioned before, older models of heating units may not perform as efficiently or effectively as newer models. This can result in higher energy bills due to the system having to work harder to heat your home and can also cause other issues such as uneven temperatures throughout the house or frequent breakdowns.

Upgrading your heating unit can help alleviate these issues and provide you with a more reliable and efficient system that will last for years to come.

Upgrading heating unit can provide extra protection, increased appeal and improved performance.

Benefits of Upgrading Your Heating Unit

At Champion Services, we understand the importance of keeping your home comfortable, which is why we are committed to providing the best quality heating services. An outdated or inefficient heating unit can be a major source of discomfort and frustration, so upgrading your system is an important decision that should not be taken lightly. Here are some of the benefits you can experience when you upgrade your heating unit.

More Efficient System

One of the most significant advantages of upgrading your heating unit is that it will become more efficient. Newer models are designed with improved energy efficiency in mind, so they use less energy to heat your home while still providing the same level of comfort. This means that you’ll save money on energy costs and reduce your carbon footprint at the same time.

Warranty Coverage

When you upgrade your heating unit, you’ll also get warranty coverage from the manufacturer. This means that if something goes wrong with your new system, you won’t have to worry about footing the bill for repairs or replacement parts. Most warranties cover parts and labor for a certain number of years, giving you peace of mind knowing that you won’t have to pay out-of-pocket if something goes wrong with your new system.

Increase Home Value

Upgrading your heating unit can also increase the value of your home if you ever decide to sell it. Potential buyers are always looking for homes with modern amenities like updated HVAC systems as this makes them more attractive investments. Investing in a new heating unit now could potentially increase the resale value of your home down the line.

Improved Performance

Finally, upgrading your heating unit will also result in improved performance and reliability. Newer models are designed with better technology and higher-quality components than older units, so they tend to last longer and operate more efficiently than their predecessors. This means that you can enjoy a consistently comfortable temperature in your home without having to worry about breakdowns or repair costs down the road.

At champion services, we understand how important it is to keep your home comfortable all year round. That’s why we offer top-notch HVAC services at a fair price point! If you need help upgrading or repairing your heating unit, give us a call today!

Benefit of UpgradingDescription
More Efficient SystemUses less energy to heat your home while still providing the same level of comfort.
Warranty CoverageManufacturer warranty covers parts and labor for a certain number of years.
Increase Home ValueInvesting in a new heating unit now could potentially increase the resale value of your home.
Improved PerformanceNewer models last longer and operate more efficiently than their predecessors.

How to Upgrade Your Heating Unit

Upgrading your heating unit can be a big investment, but it is worth considering for many reasons. Not only will you get more efficient system with warranty coverage, but you can also increase the value of your home and improve performance. Here are some tips from Champion Services on how to upgrade your heating unit.

Get Professional Help

The first step in upgrading your heating unit is to get professional help. A qualified technician can assess your current system and provide advice on what needs to be done to make sure the installation is successful. It’s important to find a reputable HVAC company that specializes in heating unit upgrades so that you can be sure that the job is done correctly and safely. At Champion Services, our technicians have years of experience and use the latest technology to ensure that all installations are up-to-date and meet industry standards.

Research Rebates and Financing Options

Once you’ve chosen a contractor, it’s time to research any rebates or financing options available for upgrading your heating unit. Many utility companies offer incentives for energy efficient upgrades, so check with them first. Additionally, many HVAC companies offer financing options that can help make the cost of an upgrade more manageable.

Schedule an In-Home Estimate

The last step in upgrading your heating unit is scheduling an in-home estimate with a qualified technician. During this visit, they will measure your home and discuss the various options available for replacing or upgrading your existing system. They will also explain any additional costs associated with the installation such as ductwork or wiring changes that may need to be made. After the visit, you should have a better understanding of what type of system would best suit your needs as well as how much it will cost to complete the project.

At Champion Services, we understand how important it is to keep your family comfortable during cold weather months, which is why we strive to provide top-notch services at a fair price point! If you’re considering upgrading your heating unit, don’t hesitate to reach out for professional assistance today!

upgrade heating unit to increase efficiency, value of home and performance. Professional help needed for successful installation with potential rebates and financing options. In-home estimate required to understand best system and costs.

Conclusion

Upgrading your heating unit is a great way to improve the efficiency and performance of your home. With improved efficiency, you can save money on energy costs, while also increasing the value of your home. Plus, with a new system, you will have warranty coverage for any repairs or replacements that may be needed in the future.

At Champion Services, we understand how important it is to have a reliable and efficient heating system in your home. That’s why we offer professional services to help you upgrade your heating unit safely and effectively. We are available 24/7 to assist with any repairs, maintenance, new installations or replacements. Contact us today to schedule an in-home estimate and get started on upgrading your heating unit!

Overview of Heat Pump Defrosting

Heat pumps are a popular choice for many homeowners due to their efficiency and cost savings. However, like any other hvac system, heat pumps can experience issues with freezing. In this article, we will discuss the causes of freezing in heat pumps, the steps for defrosting a heat pump, and when to call for professional help.

What Causes a Heat Pump to Ice Up?

Heat pumps are designed to transfer heat from one area to another. During the winter months, when temperatures drop outside, the heat pump is responsible for pulling warm air from inside the home into the outdoor unit. When temperatures drop too low or humidity levels increase, frost can form on the outdoor unit. This frost can eventually lead to an ice buildup which can block airflow and cause severe damage to the system if left untreated.

The Defrost Cycle

most modern heat pumps have an automatic defrost cycle that kicks in when it senses an ice buildup on the outdoor unit. During this cycle, the system will reverse its flow of air in order to melt any ice that has formed on the unit. The melted ice then drains away from the unit via a drain line or gutter system.

Other Reasons for Freezing

In addition to cold temperatures and high humidity levels, there are other factors that can cause a heat pump to freeze up such as clogged filters, faulty thermostats or wiring issues. If these underlying problems are not addressed, they could result in further damage down the road.

At Champion Services we understand how important it is to keep your HVAC system running efficiently during all seasons of the year. With our team of experienced technicians and state-of-the-art equipment we are ready to assist you with all your heating and cooling needs!

Overview of Heat Pump Defrosting

Heat pumps are a great way to keep your home comfortable year-round. However, they can sometimes ice up due to a variety of reasons. Understanding the defrost cycle and how it works is key to knowing when and how to defrost your heat pump. Additionally, there are other factors that can cause your heat pump to freeze up, such as improper drainage from gutters and faulty wiring or thermostats. Knowing when and how to address these issues is important for keeping your heat pump running properly.

Steps for Defrosting a Heat Pump

Shutting Down the System

The first step in defrosting your heat pump is to shut down the system entirely. This means turning off both the indoor and outdoor units completely. Once this is done, wait at least 15 minutes before proceeding with any further steps.

Cleaning the Outdoor Unit

Once you have shut down the system, take some time to clean the outdoor unit of your heat pump. Remove any debris or leaves that may have accumulated around it and make sure it is free of obstructions. Additionally, check for any signs of damage or wear on the unit itself. If you notice anything out of the ordinary, call a professional right away as this may be an indication that something more serious is wrong with your system.

Checking the Thermostat and Wiring

Next, inspect both the thermostat and wiring for signs of damage or wear. Make sure all connections are secure and that there are no frayed wires or loose connections that could be causing an issue with your system’s performance. If you notice any problems here, contact a professional right away as this could be an indication of a larger issue with your system’s wiring or thermostat settings.

Ensuring Proper Drainage from Gutters

Another factor that can cause your heat pump to freeze up is improper drainage from gutters near your home’s exterior walls. Make sure all gutters near these walls are free from debris and functioning properly so that water can drain away from them without issue. If you suspect there is an issue here, contact a professional right away as this could be causing significant damage to your home’s exterior walls if left unchecked for too long.

Turning on the System

Once all of these steps have been completed, it’s time to turn on your system again and see if it runs properly without freezing up again. Start by turning on just the indoor unit first before turning on the outdoor unit as well; this will help ensure everything runs smoothly once both units are operational again. Keep an eye on things over the next few days to make sure everything remains running properly without freezing up again in order to avoid needing additional repairs later down the line.

Heat pumps can freeze up due to various causes, and understanding the defrost cycle is important in addressing these issues. Interesting. Shut down system, clean outdoor unit, check thermostat & wiring, ensure proper drainage from gutters, turn on system.

When to Call for Professional Help

At Champion Services, we understand that many homeowners are capable of performing basic maintenance and repairs on their own heat pumps. However, there are times when it is best to call in a professional for help. In these cases, our experienced technicians can provide the necessary troubleshooting and repairs to get your system up and running again.

Troubleshooting Common Problems

When it comes to heat pump defrosting, there are a variety of common problems that can arise. These include issues with the thermostat, wiring, or drainage from gutters. In some cases, the outdoor unit may require cleaning or other maintenance tasks. In any of these scenarios, an experienced technician can quickly identify the source of the problem and provide a solution.

Benefits of Professional Assistance

In addition to diagnosing and repairing common issues with heat pump defrosting, professional technicians can also provide preventative maintenance services that can help keep your system running smoothly for years to come. By having regular inspections and tune-ups performed by a qualified technician, you can ensure that your system is operating at peak efficiency and minimize the risk of needing costly repairs down the line.

At Champion Services, we have been providing quality HVAC services since 1982. Our team of experienced technicians is available 24/7 to assist with all your heating and cooling needs. We take pride in providing top-notch service at a fair and reasonable price point! Contact us today for more information about our services or to schedule an appointment.

Common ProblemsBenefits of Professional Assistance
ThermostatDiagnose and repair common issues
WiringProvide preventative maintenance
Drainage from guttersEnsure system is operating efficiently
Outdoor unit cleaning/maintenance24/7 availability for assistance

Conclusion

Heat pumps are a great way to keep your home comfortable all year round, but they can be prone to freezing up. Fortunately, there are steps you can take to defrost your heat pump and get it working again. First, shut down the system and clean the outdoor unit. Then check the thermostat and wiring, make sure drainage from gutters is proper and turn on the system. If these steps don’t work or you are uncertain about how to proceed with any of them, it’s best to call a professional HVAC technician for assistance. At Champion Services, we have been providing top-notch plumbing and HVAC services in Evanston, WY and Ogden, UT since 1982. Our experienced technicians are available 24/7 to help troubleshoot common problems or provide any other assistance you may need with your heat pump or other systems in your home. Contact us today for more information!

Overview of Heat Pumps and Mini Splits

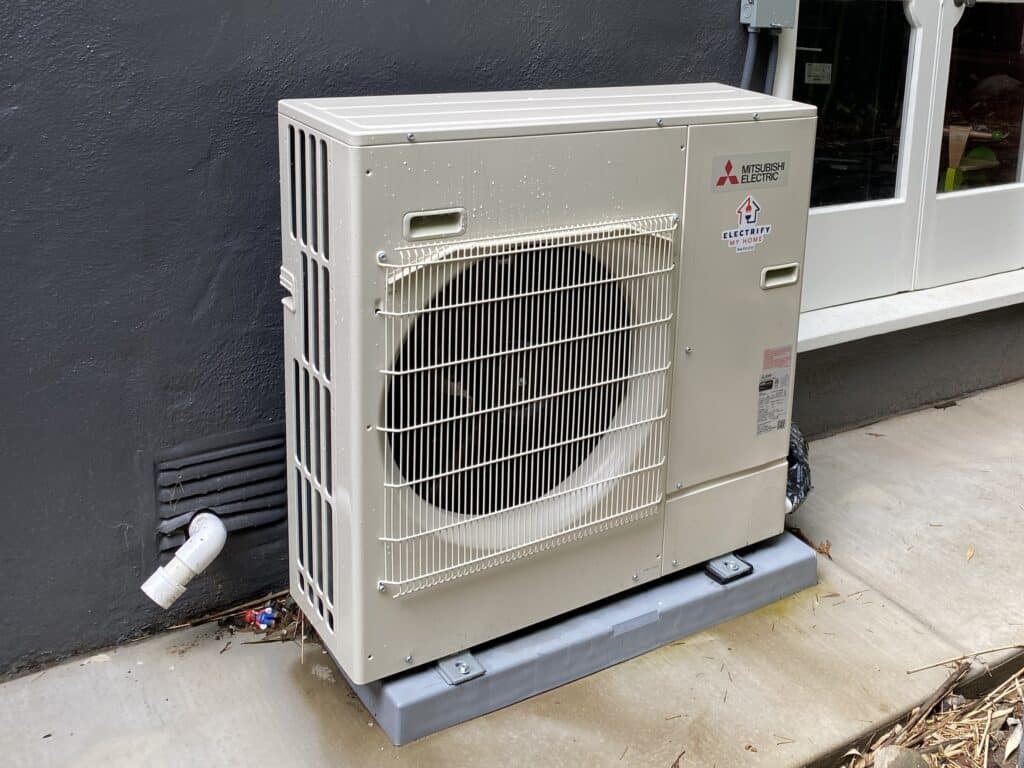
Heat pumps are a type of HVAC system that utilizes the natural heat transfer properties of air and water to move heat from one area to another. They are an efficient way to keep your home comfortable year-round, as they can both cool and heat your home depending on the season. heat pumps can be either ducted or ductless, and each has its own advantages.

What is a Heat Pump?

A heat pump is an HVAC system that moves heat from one place to another, rather than generating it. It uses the natural temperature exchange between air and water to move warm air into or out of your home, depending on the season. This makes it an energy-efficient choice for heating and cooling your home all year round.

What Are the Differences Between Ducted and Ductless Heat Pumps?

The main difference between ducted and ductless heat pumps is in how they deliver conditioned air throughout your home. A ducted system uses a network of ducts to distribute heated or cooled air throughout your home, while a ductless system uses individual wall-mounted units that each provide conditioned air to their own zone in your home.

Which Is Better: Ducted or Ductless Heat Pumps?

The best option for you will depend on your specific needs and preferences. Ducted systems are more cost effective if you have a large space that needs to be heated or cooled, while ductless systems offer more flexibility when it comes to zoning different areas in your home. Ultimately, it’s important to consult with an experienced HVAC professional who can help you determine which type of system will work best for you.

Benefits of Installing a Heat Pump in Your Home

Heat pumps are a great way to keep your home comfortable and energy efficient all year round. Heat pumps are an efficient alternative to traditional heating and cooling systems, as they can both heat and cool your home. They also offer many benefits that make them a desirable choice for homeowners looking to upgrade their current system.

Increased Comfort Levels

One of the most significant benefits of installing a heat pump is the increased comfort levels it offers. Heat pumps provide consistent temperatures throughout your entire home, so you won’t have to worry about hot or cold spots. Additionally, they operate quietly, creating a peaceful environment in your home.

Improved Air Quality

Heat pumps also help improve air quality by filtering out dust and other airborne particles from the air in your home. This helps reduce allergens and improves indoor air quality, which is especially beneficial for those with allergies or asthma.

Lower Energy Bills

Installing a heat pump can also help lower your energy bills. Heat pumps use less energy than traditional heating systems, so you can save money on your monthly utility bills. Additionally, some local utilities offer incentives for installing energy-efficient systems like heat pumps, which can further reduce the cost of installation and operation.

Longer Lifespan for Your System

Heat pumps are designed to last longer than traditional heating and cooling systems, so you won’t have to worry about replacing them as often as you would with other systems. With proper maintenance and care, heat pumps can last up to 15 years or more, making them an excellent long-term investment for any homeowner.

Overall, installing a heat pump in your home is a great way to increase comfort levels while saving money on energy costs over time. With its improved air quality and longer lifespan, investing in a heat pump is an economical choice that will pay off in the long run. At Champion Services we understand how important it is to keep your family comfortable all year round while staying within budget – that’s why we offer quality products and services at affordable prices! Contact us today for more information about our HVAC services!

Installing a heat pump is an energy efficient and economical choice that provides consistent temperatures, improved air quality, and a longer lifespan.

How to Find a Reliable HVAC Contractor

Finding a reliable and trustworthy HVAC contractor is essential for any home or business owner looking to install, repair, or replace their heat pump or mini split system. A good contractor will be knowledgeable about the different types of systems available, as well as the benefits and drawbacks associated with each one. To ensure that you are getting the best service possible, there are a few steps you can take to find a reliable HVAC contractor.

Research Credentials and Reviews

The first step in finding a reliable HVAC contractor is researching their credentials and reviews. Check online for customer reviews of the company, as well as their Better Business Bureau rating. You should also check if they are licensed, bonded, and insured to work in your state. This ensures that they have the proper qualifications and experience to complete your project correctly and safely.

Ask for Referrals from Friends and Family Members

Another great way to find a reliable HVAC contractor is by asking friends and family members who have recently had work done on their own homes or businesses. They may be able to provide you with referrals for contractors they have used in the past, which can help narrow down your search significantly.

Inquire About Their Services and Warranties

Once you have found several potential contractors, you should inquire about their services and warranties offered. Ask about any additional fees associated with installation or repair services, as well as what kind of warranty they offer on parts and labor. A good contractor will be able to provide you with all of this information upfront so that there are no surprises later on down the line.

By taking these steps when searching for an HVAC contractor, you can ensure that you get quality services at an affordable price point from a reliable source. At Champion Services in Evanston WY & Ogden UT, we take pride in providing top-notch services at a fair price since 1982! We specialize in heating, air conditioning, plumbing, electrical repairs & installations – contact us today!

StepDescription
Research Credentials and ReviewsCheck online for customer reviews and BBB rating. Ensure they are licensed, bonded, and insured to work in your state.
Ask for Referrals from Friends and Family MembersAsk friends and family members who have recently had work done on their own homes or businesses.
Inquire About Their Services and WarrantiesAsk about additional fees associated with services, as well as warranties offered on parts and labor.

Brown’s Heating & Cooling: Your Trusted Resource for Quality Heat Pump Services

At Brown’s Heating & Cooling, we offer quality heat pump services to customers in Evanston, WY and Ogden, UT. We are a family-owned and operated HVAC company that has been providing top-notch services since 1982. Our team of experienced HVAC professionals is dedicated to providing our customers with the best products and services at an affordable price point.

Experienced HVAC Professionals

Our technicians have years of experience installing, repairing, and maintaining a variety of heat pumps from leading manufacturers. We will work closely with you to ensure that your system is installed correctly and running efficiently. We provide comprehensive inspections and maintenance services to keep your system running smoothly all year long.

Quality Products and Services at Affordable Prices

We use only the highest quality materials when installing or repairing heat pumps in your home. We understand that investing in a new heating or cooling system can be expensive, which is why we strive to provide our customers with the most competitive prices on the market. We also offer financing options so you can get the system you need without breaking the bank.

Contact Us Today!

If you’re looking for reliable hvac services in Evanston, WY or Ogden, UT, look no further than Brown’s Heating & Cooling. Contact us today to learn more about our heat pump installation and repair services or to schedule an appointment with one of our experienced technicians.

Conclusion

Heat pumps are an efficient and cost-effective way to heat and cool your home. Whether you choose a ducted or ductless system, you’ll enjoy improved air quality, increased comfort levels, and lower energy bills. It’s important to find a reliable HVAC contractor who can provide quality services at an affordable price point. At Champion Services, we have over 38 years of experience providing top-notch heating, air conditioning, plumbing, and electrical services. Our team is on call day and night to help with repairs, maintenance, new installations and replacements. Contact us today to learn more about how we can help you with your next project!

At Champion Services, we understand that installing a gas line in your home can be a daunting task. There are many steps involved and safety precautions to take before beginning the installation. It is important to purchase suitable pipes for the job and make sure all connections are tight and secure. Additionally, you should stop the gas flow hours before beginning work and confirm that it is off. To ensure there are no air pockets in the lines, you should dope the pipe connections and recheck measurements if necessary. Once the appliance is connected, you should check for gas flow and listen for a sound while it’s working. Finally, confirm that other devices using the gas line are functioning properly.

If any of these steps seem overwhelming or you are unsure of how to complete them safely, call an expert from Champion Services. We have been providing top-notch plumbing and HVAC services since 1982 and our team of experts is ready to assist with your new gas line installation. Contact us today to get started!

Necessary Preparations Before Installation

Installing a gas line in your home can be dangerous if done without the help of an expert. It is important to take the necessary precautions and preparations before starting any installation work. To ensure that the installation process goes smoothly, you should purchase the correct pipes and make sure all connections are tight and secure. Additionally, it is essential to stop the gas flow hours before beginning work and confirm that it is off.

Determine and Purchase Suitable Pipes

The first step in preparing for a gas line installation is to determine what type of pipe is suitable for your project. Depending on the type of appliance you are connecting, different types of pipes may be required. For example, if you are connecting a stove or oven, you will need to use metal pipes such as black steel or copper tubing. If you are connecting a water heater or other appliance that requires high pressure, then thicker plastic piping may be necessary. Once you have determined what type of pipe is suitable for your project, you can purchase the necessary pipes from a local hardware store or online retailer.

Connect Gas Line to the New Appliance

Once you have purchased the correct pipes, it is time to connect them to the new appliance. This is best done by following manufacturer instructions or consulting with an expert who specializes in gas line installations. It is important to ensure that all connections are tight and secure so that there are no leaks when the gas line is turned on. Additionally, it is important to recheck measurements if necessary to ensure there are no air pockets in the lines that could cause problems later on.

Ensure All Connections are Tight and Secure

It is also important to ensure that all connections between pipes are tight and secure before turning on the gas line. This can be done by using pipe dope which helps seal any gaps between fittings and prevents leaks from occurring after installation has been completed. Additionally, it is important to check for any loose fittings which can cause serious safety issues if not properly secured before turning on the gas line.

Call an Expert to Install the Gas Line

Finally, it is always best practice to call an expert for any major gas line installations in your home as they will be able to provide advice on how best to install your new gas line safely and efficiently with minimal risk of accidents or damage occurring during the process. An expert will also be able to check for any potential problems prior to installation which could save time and money in both the short-term and long-term future of your home’s gas line system

PreparationDescription
Determine and Purchase Suitable PipesDetermine what type of pipe is suitable for the project and purchase it from a local hardware store or online retailer.
Connect Gas Line to the New ApplianceFollow manufacturer instructions or consult with an expert who specializes in gas line installations.
Ensure All Connections are Tight and SecureUse pipe dope to seal any gaps between fittings and check for any loose fittings.
Call an Expert to Install the Gas LineAn expert can provide advice on how best to install your new gas line safely and efficiently with minimal risk of accidents or damage occurring during the process.

Stopping the Gas Flow

Before you start any gas line installation project, you need to make sure that the gas flow into your home is stopped. This will help ensure that no one gets injured and that the work can be done safely and efficiently. There are a few steps you should take when stopping the gas flow before starting work on a new gas line installation.

Locate the Control

The first step in stopping the gas flow is to locate the control valve for your home’s gas line. This is usually located near the meter or where the gas line enters your home. Once you have located it, turn off the valve and confirm that it has been shut off completely. Be aware that some older homes may have multiple valves controlling different sections of the gas line, so make sure you check all of them if necessary.

Confirm You Have Stopped Gas Flow Into the Home

Once you have turned off all of the valves, it’s important to make sure that there is no longer any gas flowing into your home. To do this, you should check for any leaks in your pipes or connections by using a soapy water solution or leak detector spray. If any leaks are detected, they must be fixed before continuing with your project.

Reapply Pipe Dope if Necessary

If there are any loose connections in your existing pipes, you should reapply pipe dope or thread sealant to ensure a tight seal before beginning work on your new gas line installation. This will help prevent any air pockets from forming in your lines which could cause problems down the road. Make sure to recheck measurements once pipe dope has been applied if necessary to ensure everything fits correctly before continuing with your project.

Stopping the gas flow is an important step in ensuring safety when installing a new gas line in your home. By taking these three simple steps – locating and turning off all control valves, checking for leaks, and reapplying pipe dope – you can make sure that no one gets injured during installation and that everything runs smoothly throughout the process.

Stopping the gas flow is essential for safety when installing a new gas line in your home. Locate and turn off control valves, check for leaks, reapply pipe dope.

Open the Connection

Opening a gas line connection is a delicate process that should only be done by an experienced and certified professional. It requires knowledge and precision to ensure that all connections are secure and that there are no air pockets in the lines. To open the connection, you must first check for gas flow and confirm that the appliance is connected properly.

Check for Gas Flow

The first step in opening a gas line connection is to check for gas flow. This can be done by listening for a sound while it’s working or by using a special tool designed to detect gas flow. If you hear any type of sound, then you know that there is gas flowing through the line. You should also check for any leaks around the pipe connections as well as any other signs of potential danger such as corrosion or rusting of the pipes.

Confirm Connection to Your Appliance

Once you have confirmed that there is gas flowing through the line, you must then confirm that your appliance is securely connected to the line. This can be done by checking all connections and making sure they are tight and secure. You should also recheck measurements if necessary to ensure accuracy and prevent any air pockets from forming in the lines.

Check Other Devices Using the Gas Line

Finally, you must confirm that other devices using the same gas line are functioning properly before opening up the connection completely. This includes checking for any leaks around their connections as well as ensuring that all valves are turned off when not in use. If everything checks out, then you can open up the connection fully and begin using your new appliance safely and efficiently!

Installing a gas line in your home can be a dangerous task if done without the help of an expert. At Champion Services, we understand that it is best to leave any kind of plumbing or HVAC work to the professionals. Before starting any type of installation, you should purchase the correct pipes and make sure all connections are tight and secure. You should also stop the gas flow hours before beginning work and confirm that it is off. To ensure there are no air pockets in the lines, you should dope the pipe connections and recheck measurements if necessary. Once the appliance is connected, you should check for gas flow and listen for a sound while it’s working. Finally, confirm that other devices using the gas line are functioning properly.

At Champion Services, we strive to provide quality services at a fair price point so that our customers can feel confident in their installations. We prioritize safety when completing any job, especially those involving natural gas lines. Our team of experienced plumbers and HVAC technicians are available 24/7 to assist with any installation or repair needs you may have. Don’t take chances with your safety—call Champion Services today!

At Champion Services, we understand the importance of efficiency. We strive to provide our customers in Evanston, WY and Ogden, UT with reliable HVAC, plumbing and electrical services that help them save energy and money. In this blog post, we’ll discuss how you can maximize your boiler’s efficiency by reducing the flow temperature, insulating pipes and cylinders, having an annual check, keeping your boiler clean and considering a system cleanse. Read on to learn more!

Reducing Flow Temperature

boiler efficiency can be improved by reducing the flow temperature. This is because a lower temperature reduces the amount of energy needed to heat up the water, resulting in reduced energy use. It is important to note that this should only be done if it is safe and appropriate for your boiler system.

Benefits of Lowering Flow Temperature

Lowering the flow temperature of your boiler can provide several benefits, including:

  • Reduced energy consumption.
  • Lower running costs.
  • Reduced emissions and improved environmental sustainability.
  • Increased boiler lifespan due to reduced wear and tear.

It is important to ensure that you are not compromising safety when lowering your boiler’s flow temperature. To do this, you should consult with a qualified engineer who can advise on the best course of action for your specific boiler system.

How to Lower Flow Temperature

There are several ways to reduce the flow temperature of your boiler:

  • Using a Thermostat: A thermostat can be used to control the flow temperature of your boiler. The thermostat should be set at a level that is suitable for both safety and efficiency.
  • Installing a Heat Exchanger: A heat exchanger can be installed in order to reduce the flow temperature. This works by transferring heat from one fluid (such as hot water) to another (such as cold water). This helps to reduce energy consumption while still providing sufficient heating.
  • Adding an Expansion Tank: An expansion tank can also help to reduce flow temperatures by allowing air into the system. This helps to reduce pressure, which in turn reduces the boiling point of water within the system.
  • Adjusting boiler settings: The settings on your boiler may need adjusting in order for it to operate efficiently at a lower flow temperature. Your engineer will be able to advise on what adjustments need to be made.

These measures should only be taken after consulting with a qualified engineer who has experience working with boilers. They will be able to advise on what adjustments are necessary and how they should be implemented safely.

Lowering flow temperature of boiler can reduce energy consumption, running costs, emissions and increase its lifespan.

Insulating Pipes and Cylinder

Insulating pipes and cylinders is another way to maximize the efficiency of your boiler and reduce energy use. Insulation helps to prevent heat loss from hot water pipes, keeping the water at a higher temperature for longer periods of time. This reduces the amount of energy needed to reheat the water, resulting in lower energy bills. In addition, insulation helps to keep the boiler itself at a more consistent temperature, which can help to reduce wear on the system over time.

Types of Insulation

When insulating your boiler’s pipes and cylinders, there are several different types of insulation available. The most common type is foam pipe insulation, which is typically made from polyethylene or fiberglass. This type of insulation comes in pre-cut lengths that can be easily fitted around your pipes and cylinders. Other types of insulation include fiberglass batting or mineral wool, which can be used in larger spaces such as boilers and tanks. Each type has its own benefits and drawbacks, so it’s important to do some research before deciding which type is best for your needs.

Installation

Installing insulation around your boiler’s pipes and cylinders is relatively straightforward but should always be done with caution. Before you start installation, make sure all power sources are turned off and any open flames are extinguished to avoid potential fires or explosions. When cutting the insulation material to size, use a sharp knife or scissors to avoid fraying the edges of the material. Additionally, wear gloves when handling insulation material as it may contain irritants that can cause skin irritation or respiratory problems if inhaled.

Maintenance

Once you have installed insulation around your boiler’s pipes and cylinders, it’s important to check them regularly for signs of wear or damage. If you notice any cracks or gaps in the material, replace it immediately as this could lead to further heat loss from your system. Additionally, check for any areas where dust or dirt has accumulated on the surface of the insulation material as this could reduce its effectiveness over time. Cleaning these areas regularly will help ensure that your system remains efficient for years to come.

Insulating pipes and cylinders is an effective way to maximize your boiler’s efficiency and reduce energy use while also helping protect against potential accidents due to fire or explosion risks. With careful installation and regular maintenance checks, you can ensure that your system remains safe and efficient for many years to come.

Type of InsulationBenefitsDrawbacks
Foam Pipe InsulationPre-cut lengths, easy to fit around pipes and cylindersPotentially contains irritants that can cause skin irritation or respiratory problems if inhaled
Fiberglass Batting or Mineral WoolUsed in larger spaces such as boilers and tanksNot pre-cut, may require additional cutting to fit around pipes and cylinders
Maintenance ChecksEnsures system remains safe and efficient for many years to comeRegular cleaning needed to prevent dust or dirt from accumulating on the surface of insulation material, reducing its effectiveness over time

Annual Checks and Cleaning

Boiler efficiency can be improved significantly by ensuring that it is regularly checked and maintained. An annual check-up will help identify any potential problems with the boiler before they become serious. It is also important to keep the boiler clean, as this will reduce energy consumption and improve its performance. This section will discuss the importance of having an annual check-up and keeping your boiler clean.

The Benefits of Annual Checks

Having an annual check-up for your boiler is essential for maintaining its efficiency. During a check-up, a technician will inspect the system to ensure that it is working properly and that there are no signs of wear or damage. They can also identify any potential issues with the boiler, such as leaks or blocked pipes, which can be rectified before they cause more serious problems.

In addition to identifying any potential issues, an annual check-up can also help to improve the efficiency of the system. The technician may suggest changes that can be made to improve efficiency, such as adjusting the temperature settings or altering the pressure in the system. These changes can help to reduce energy consumption and save money on bills in the long run.

Cleaning Your Boiler

Keeping your boiler clean is another important factor in improving its efficiency. Over time, dust and debris can accumulate inside the unit, reducing its performance and increasing energy use. Regular cleaning can help remove these particles, allowing your boiler to run more efficiently.

It is recommended that you have your boiler professionally cleaned at least once a year by a qualified technician. This will ensure that all areas of the unit are thoroughly cleaned and any potential issues are identified quickly. A professional cleanse may also involve using specialised equipment to remove sludge from within the system, which can further improve efficiency levels.

Conclusion

Having an annual check-up for your boiler and keeping it clean are both essential for maintaining its efficiency levels. An annual check-up will help identify any potential problems with the system before they become serious, while regular cleaning will remove dust and debris which could otherwise reduce performance levels. By following these steps, you can ensure that your boiler runs efficiently and save money on energy bills in the long run.

Regular checks and cleaning of boiler is essential for its efficiency, saving money on energy bills.

Conclusion

At Champion Services, we understand the importance of keeping your boiler running efficiently. Reducing the flow temperature, insulating pipes and cylinders, and having an annual check are all great ways to maximize efficiency and reduce energy use. Additionally, regular cleaning and a system cleanse can help improve its efficiency. Our team of experienced technicians is here to provide you with top-notch service at a fair and reasonable price point. Contact us today for all your HVAC, plumbing or electrical needs in Evanston, WY and Ogden, UT!

Introduction

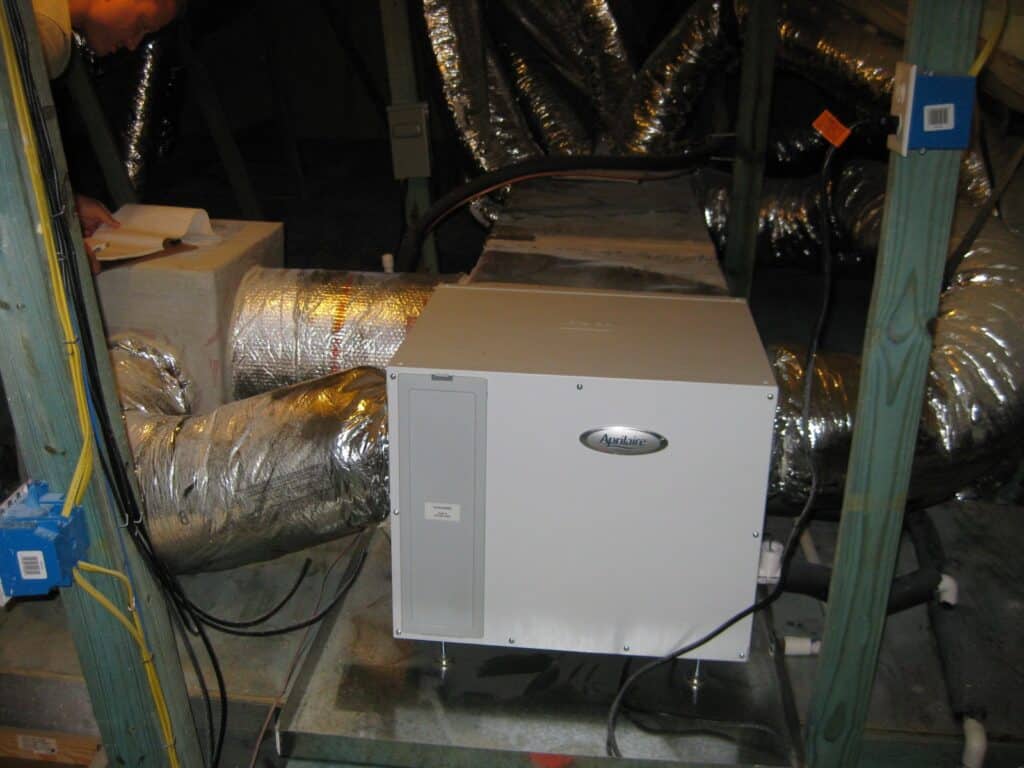
At Champion Services, we understand the importance of saving money and energy when it comes to operating your whole-home dehumidifier. A dehumidifier is an appliance that reduces and maintains the level of humidity in a room or area. It removes moisture from the air, making it more comfortable for occupants and reducing the risk of mold and other allergens from forming.

There are many benefits to using a whole-home dehumidifier, including improved air quality, better indoor climate control, and reduced energy costs. In this blog post, we will provide four tips for operating your whole-home dehumidifier so you can save money and energy while keeping your home comfortable all year round.

Change the Air Filter Regularly

The first tip for operating your whole-home dehumidifier is to change the air filter regularly. The air filter in a dehumidifier is responsible for trapping dust, dirt, and other airborne particles that can be harmful to your health. By changing the air filter regularly, you can ensure that your air quality is kept clean and free of pollutants.

Reasons to Change the Air Filter Regularly

There are several reasons why it is important to change the air filter regularly in your whole-home dehumidifier. First, a dirty air filter will reduce the efficiency of your unit, leading to higher energy costs and reduced performance. Additionally, a dirty air filter will cause more allergens and pollutants to circulate through your home, making it harder for those with allergies or asthma to breathe properly. Finally, a dirty air filter can lead to clogged coils and other parts within the unit which can lead to costly repairs or even replacement of the entire unit.

How Often to Change the Air Filter

It is recommended that you change the air filter in your whole-home dehumidifier every three months or as needed based on how often you use it. If you live in an area with high levels of dust or pollen, then you may need to change it more often than every three months. You should also check your owner’s manual for specific recommendations on how often you should change the air filter in your unit.

Cost Savings from Changing the Air Filter Regularly

By changing the air filter regularly in your whole-home dehumidifier, you can save money on energy costs and repair bills due to increased efficiency and reduced wear and tear on parts within the unit. Additionally, by keeping your air clean and free of allergens and pollutants, you can improve indoor air quality which can have positive health benefits for everyone living in your home.

Clean and Maintain the Unit

Cleaning and maintaining your whole-home dehumidifier is an important part of ensuring that it runs efficiently and effectively. Regular maintenance can help to reduce energy costs, improve air quality, and extend the life of the unit. Here are some reasons why you should clean and maintain your dehumidifier, as well as steps for doing so.

Reasons to Clean and Maintain the Unit

Regular cleaning and maintenance of your dehumidifier is essential for keeping it running at peak efficiency. Dust, dirt, pet hair, mold spores, and other debris can accumulate in the filter over time, reducing air flow and making the unit work harder than necessary to remove moisture from the air. This can lead to higher energy bills and decreased air quality in your home. Additionally, if not regularly maintained, a dehumidifier can become clogged with debris or develop mechanical issues that require costly repairs or replacement parts.

Steps for Cleaning and Maintaining the Unit

Cleaning and maintaining your dehumidifier is relatively simple but should be done on a regular basis. Start by unplugging the unit from its power source before removing any panels or covers that provide access to internal components such as filters or condenser coils. Vacuum out any visible dust or debris using a soft brush attachment, then wipe down all surfaces with a damp cloth to remove any remaining dirt or grime. Replace any damaged parts such as filters or fan blades, then reassemble the unit before plugging it back into its power source.

It’s also important to check the condensate pan for signs of buildup or corrosion every few months; if necessary, clean it out with warm water and a mild detergent before allowing it to dry completely before reinstalling it in the unit. Additionally, inspect hoses for signs of wear or damage on a regular basis; replace any damaged hoses right away in order to avoid further damage to other components of your dehumidifier.

Cost Savings from Cleaning and Maintaining the Unit

Regularly cleaning and maintaining your dehumidifier can help you save money on energy bills in two ways: firstly by improving air flow through the unit which helps it run more efficiently; secondly by preventing mechanical issues caused by clogs or buildup which could otherwise require costly repairs or replacements parts down the line. Additionally, regular maintenance helps extend the life of your dehumidifier so you won’t have to replace it prematurely due to neglectful care.

Set an Appropriate Humidity Level

An appropriate humidity level is essential for the efficient operation of a whole-home dehumidifier. Setting the correct humidity level can help to reduce energy consumption, save money on utility bills, and improve indoor air quality.

Reasons to Set an Appropriate Humidity Level

The primary reason to set an appropriate humidity level is to ensure that the dehumidifier operates efficiently. If the humidity level is too low, the dehumidifier will have to work harder in order to remove moisture from the air, resulting in higher energy costs and increased wear and tear on the unit. On the other hand, if the humidity level is too high, it can cause mold and mildew growth which can lead to health problems and damage to your home.

In addition, setting an appropriate humidity level can help you maintain a comfortable indoor climate by preventing condensation on walls and windows. This can also help reduce dust mite infestations which are known triggers for allergies and asthma.

Steps for Setting an Appropriate Humidity Level

To set an appropriate humidity level for your whole-home dehumidifier, you should first measure the relative humidity in your home with a hygrometer or other device designed for this purpose. The ideal range for most homes is between 30% and 50%. Once you have determined the current relative humidity in your home, you can adjust the settings on your dehumidifier accordingly. Most units have a built-in humidistat that allows you to easily set the desired humidity level.

If you don’t have a built-in humidistat, you may need to purchase one separately or install a smart thermostat with integrated humidity control features. You should also check your dehumidifier’s user manual for any specific instructions regarding how to adjust its settings correctly.

Cost Savings from Setting an Appropriate Humidity Level

Setting an appropriate humidity level with your whole-home dehumidifier can result in significant cost savings over time by reducing energy consumption and wear and tear on the unit itself. It can also help prevent costly repairs caused by mold or mildew growth due to excessive moisture levels in your home. Finally, maintaining proper indoor air quality through proper humidity control can help reduce medical bills associated with allergies or asthma triggered by dust mites or other airborne allergens that thrive in moist environments.

Use a Programmable Thermostat

A programmable thermostat is an essential tool for controlling the temperature and humidity levels in your home. By using a programmable thermostat, you can set the thermostat to turn on and off at different times throughout the day, allowing you to save energy and money while still maintaining comfortable temperatures. Additionally, using a programmable thermostat gives you more control over the humidity levels in your home, allowing you to set it to maintain a specific level of humidity that is comfortable for you and your family.

Reasons to Use a Programmable Thermostat

Using a programmable thermostat has many advantages when it comes to saving money and energy. For one, it allows you to set the temperature of your home according to your schedule so that it is only running when you need it. This helps reduce energy consumption and save money on electricity bills. Additionally, using a programmable thermostat allows you to maintain more consistent temperatures throughout your home, which can help reduce drafts and save money on heating bills as well. Finally, using a programmable thermostat allows you to easily adjust the humidity levels in your home so that they are always comfortable for you and your family.

Steps for Installing and Using a Programmable Thermostat

Installing a programmable thermostat is relatively easy; most models come with detailed instructions that will walk you through the installation process step-by-step. Once installed, programming the thermostat is also fairly straightforward; most models allow you to input specific times of day when the temperature should be adjusted as well as what temperature should be maintained during those times. Additionally, some models also have options for setting different temperatures during different days of the week or even different seasons of the year.

Cost Savings from Using a Programmable Thermostat

Using a programmable thermostat can lead to significant cost savings over time. By setting specific times for when the temperature should be adjusted or turned off altogether, you can reduce energy consumption and lower your electricity bills significantly. Additionally, by setting specific humidity levels in your home, you can help reduce drafts and lower heating costs as well. In total, using a programmable thermostat can lead to significant cost savings over time while still ensuring that your home remains comfortable all year round.

Conclusion

At Champion Services, we believe in providing our customers with top-notch services at a fair and reasonable price point. We recommend following these four tips for operating your whole-home dehumidifier to save money and energy while also improving the air quality of your home.

The first tip is to change the air filter regularly. This will help keep the unit running efficiently and reduce energy costs. Second, clean and maintain the unit periodically to ensure optimal performance and efficiency. Third, set an appropriate humidity level for more efficient operation. Finally, use a programmable thermostat to further improve energy efficiency.

By following these tips, you can enjoy improved air quality while also reducing your energy bills. If you have any questions or need assistance with operating your whole-home dehumidifier, contact us at Champion Services today!

©2024 Champion Services All Rights Reserved