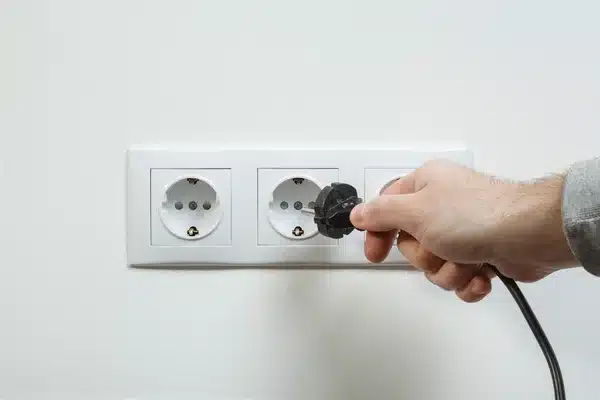
Subpanels and fuse boxes, often tucked away and overlooked, are the heart of your home’s electrical system, powering appliances and controlled by the main breaker. These electrical boxes might seem unassuming, but they play a critical role in controlling the flow of electrical current in your electrical system through the electrical wiring. Whether you’re dealing with a main fuse box or a subpanel, each one is designed to meet different electrical needs, handle various circuits, and has its unique voltage rating. Keep in mind the importance of ground fault protection and the correct use of fuses. But here’s the kicker – installing and maintaining an electrical subpanel, complete with breaker switches and circuits, isn’t as simple as flipping a ground fault switch! The future of AC is about understanding service panels, circuits, switches, and how they manage the electrical current in homes. This includes the main panel and fuse system.

Essential Materials and Tools for Installation

The Right Tools Make a Difference

Installing an electrical panel isn’t a piece of cake. It’s not just about picking up a screwdriver and getting to work on the fuse, electrical wiring, parts, or electric panel. You need an arsenal of tools.

  • Screwdrivers
  • Pliers
  • Wire strippers
  • Voltage testers

Electrical panels and electric service panels aren’t your everyday garage items, but they’re essentials in the installation process. Don’t forget about the furnace in the bedroom closet, along with the electrical box and electric panel.

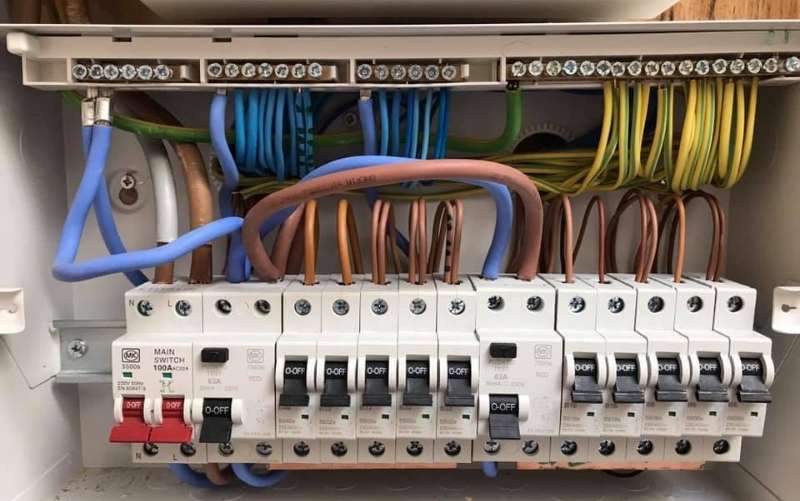
Panel Box and Circuit Breakers: The Heart of the System

Now that we’ve sorted our electric panel tools, let’s discuss the parts and system, focusing on switches and other components. A heating & cooling electrical panel, housing switches and a fuse, is more than just a metal box in your storage room; it’s a crucial service system for temperature regulation. It’s the heart of your home’s electrical system.

What you’ll need:

  1. A quality panel box.
  2. Sufficient circuit breakers matching your appliances’ requirements.

Remember, each device in your home – from light bulbs to washing machines – requires its own circuit breaker within the electrical panel. This blog post system requires routine maintenance service to guarantee the proper function of all switches.

Quality Wiring: Safety First!

Next up is wiring. Not any wires will do; quality matters here! Cheap or substandard wires in your electrical panels and electrical service panel can lead to dangerous situations like fires or electrocutions. Ensure your electric service panel and switches are of high quality.

You’ll need wires that are:

  • Suitable for carrying the required amps.
  • Resistant to heat, water, and other damaging factors.
  • Compliant with building codes for safety reasons.

Protective Gear: Better Safe Than Sorry

Finally, let’s talk safety gear. Installing an AC installation isn’t like changing a light bulb; it involves dealing with high voltage currents, much like an electrical panel in your home! This service should be handled by a professional system to ensure proper insurance coverage.

So what protective equipment should you have?

  • Insulated gloves
  • Safety glasses
  • Rubber soled shoes

This might seem overkill to get home insurance for your electric panel, but trust me, when it comes to your electrical service panel, it’s better safe than sorry!

Guidelines for Choosing Electrical Panel Location

Weighing the pros and cons of Here’s the lowdown on how to keep your furnace in tip-top shape with our heating tips and HVAC advice. Whether you need a furnace fix or furnace repair, we’ve got you covered. Remember, accessibility and safety are key.

Accessibility Matters

When installing an electrical panel, think about its accessibility. While you want your home’s electric panel, also known as an electrical service panel, somewhere easy to reach but out of the way of daily life, the same can be said for a furnace in a bedroom closet. Imagine needing to reset a tripped breaker in your electric panel or electric service panel in the middle of the night – you don’t want to be stumbling around in the dark or moving furniture just to access your electrical service panel! That’s why electrical panel maintenance is so important.

  • Pro-tip: A utility room or basement can often be a good spot for your home’s electric panel or service panel, important for insurance.

Close To The Power Line Entry Point

The closer your home’s electrical panel is to where the main power line enters, the better for your service and insurance. This minimizes the length of wire needed for the electric panel and makes installation in your home easier and cheaper, potentially affecting your service panel insurance.

  • Fact Check: According to HomeAdvisor, homeowners spend between $500-$1,000 on average when upgrading their panel’s wiring service.

Avoid Damp Or Wet Areas

Water and electricity don’t mix – we all know that! To ensure a safe home and proper moisture control, avoid installing your electrical panel in damp or wet areas like bathrooms or laundry rooms during your service. Consider using dehumidifiers in these areas to maintain a dry environment. Moisture can cause serious damage over time.

  • Case Study: A study by the Electrical Safety Foundation International (ESFI) found that water-related electrical accidents, often involving the home service panel, accounted for almost 20% of all electrical injuries in homes in 2017.

Compliance With Local Building Codes And Regulations

This one’s non-negotiable folks! Always ensure you’re compliant with local building codes and regulations when selecting a location for your home service panel. Different homes have different rules for their electric panel – what’s serviceable in one home might not fly in another.

  • Example: In some home areas, service panels must be installed at least five feet from any water source.

Remember: To find the right location for your home’s electrical panel, it should be in an accessible location close to the main power entry point, away from dampness, following local codes – that’s how you ensure optimal service!

Detailed Steps for Installing Electrical Panel

Before we get our hands dirty with the home’s electric panel, it’s crucial to prep up for service panel work. Preparing before the installation process of your home’s service panel or electric panel can save us from a lot of hustle later on.

Prep Up Before Installation

First things first, turn off the main power supply. No one wants to get zapped while working, right? Next up, gather all your tools and equipment. For home service, you’ll need an electrical panel box, circuit breakers, wires, and other necessary tools.

Attaching Wires to Circuit Breakers

Now let’s dive into the real deal – wiring. Here are some simple steps to follow:

  1. Identify each wire’s function in the service panel – hot (black), neutral (white), and ground (green or bare).
  2. Connect the hot wire to the circuit breaker.
  3. Attach the neutral and ground wires to their respective bus bars in the service panel box.

Remember folks, safety first! Always ensure you’re wearing rubber gloves when handling wires in the service panel.

Securing The Panel Box Properly

Once you’ve got all those pesky wires sorted out, it’s time to secure your service panel, also known as the electrical box. This ain’t rocket science but it needs some attention:

  1. Position your panel box where you want it installed.
  2. Use screws or bolts to secure the service panel firmly against the wall.
  3. Make sure there’s no wobble – stability is key here!

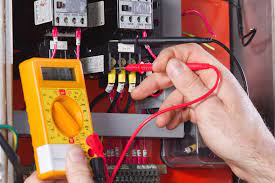
Testing Circuits Functionality

Last but not least – testing! The text doesn’t contain any keywords. Please provide the keywords to proceed with the revision.

  1. Turn on each circuit breaker individually.
  2. Use a voltage tester to check if power is flowing properly through each circuit in your service panel.
  3. If power isn’t flowing correctly from the service panel or a breaker in the service panel trips immediately, recheck your wiring connections.

And voila! You’ve just installed your own electrical panel!

Safety Measures During Installation and Maintenance

Service for electrical panel installation and maintenance is a task that demands utmost caution. It’s not just about getting the job done with the heating services panel, but also ensuring safety throughout the process.

Power Off is a Must

First things first, always remember to turn off the main power supply before you start working on an electrical panel. This might seem like a no-brainer when dealing with a service panel, but trust me, it’s one mistake you can’t afford to make.

  • Turning off the power minimizes potential hazards.
  • It ensures your safety during repairs or maintenance.

Gear Up for Safety

Next up, equip yourself with insulated gloves and safety glasses before handling the HVAC Services panel. This is essential whether you’re dealing with Heater Services, Heating Services or Cooling Services. These aren’t just fancy accessories; they’re your 24/7 Help service panel, acting as your shield against unforeseen accidents. With Cooling Innovations, they become more than just protection.

  • Insulated gloves protect your hands from electrical shocks.
  • Safety glasses safeguard your eyes from sparks or debris.

Avoid Circuit Overloading

Overloading circuits is a big no-no! A faulty heating repair service panel is not only dangerous but can also lead to fire hazards. Always ensure that each circuit carries an appropriate load.

  • Overloaded circuits generate excessive heat.
  • This heat can damage wires and potentially cause fires.

Safe Disposal of Components

When replacing old or damaged components in the service panel, dispose of them safely. You don’t want these potentially hazardous materials from your service panel causing harm in some landfill!

  • Damaged components might still carry an electric charge.
  • Safe disposal methods ensure these Cooling Solutions and IAQ Solutions service panel components don’t pose risks elsewhere.

Regular Maintenance Matters

Regular inspection and maintenance of your electrical panel are crucial. The Quick Response service panel helps detect issues early on and prevent major problems down the line.

  • Regular checks help identify signs of corrosion or damage.
  • Timely repairs keep the entire system functioning smoothly.

Know Your Building Codes

Knowing local building codes isn’t just about compliance; it’s also about ensuring safety, particularly when dealing with a service panel. These codes provide guidance on proper clearance around panels and other safety measures to follow during installation or maintenance work.

  • Non-compliance with building codes, especially regarding the service panel, can lead to safety risks.
  • It might also affect your home insurance coverage.

Remember,Safety is not an option but a necessity. So whether you’re installing a new panel or maintaining an existing one, always prioritize safety measures. And if you’re unsure about anything, don’t hesitate to seek professional HVAC advice or 24/7 help from utility services or your local building code office.

Tips for Regular Electrical Panel Servicing

Just like any other home appliance, your electrical service panel, furnace, air conditioner, and heating systems need regular maintenance and potential repair. This could include AC repair, furnace repair, heating repair or an air conditioner fix. Here’s the lowdown on how to keep your furnace in tip-top shape with our heating tips and HVAC advice. Whether you need a furnace fix or furnace repair, we’ve got you covered.

Routine Inspection is Key

First things first, get into the habit of inspecting your electric service panel regularly. This ain’t rocket science folks! Just a quick look-see once every few months will do. You’re looking for signs of wear and tear, rust or corrosion, anything out of the ordinary really.

Heating Tips Pro Tip: Use a flashlight if your heating panel is tucked away in a dark corner.

Cleanliness is Next to Godliness

Next up, we’ve got cleaning. Dust and debris can accumulate in your electrical panel box over time, just like in your Clean Air Ducts. Regular Duct Cleaning, use of Air Cleaners, and Dehumidifiers can help reduce this buildup. Not only does this make it harder for you to see what’s going on inside, but it could also cause problems with the connections.

So grab a dry cloth for moisture control and give it a good wipe down. Remember not to use any water or cleaning solutions on your Cooling Innovations products though – electricity and liquids don’t mix!

Tighten Up Those Connections

Loose connections are one of the most common causes of electrical issues. Over time, wires can loosen due to vibration or temperature changes. So make sure you tighten them up regularly.

Cornwall Fuse Box Replacement Service

But be careful here! Always turn off the main power before touching anything inside the panel box.

Call in The Pros When Needed

Last but certainly not least, know when to weigh the pros and cons of calling in professional help. If you notice any unusual signs during your inspection – things like burnt marks or strange sounds – don’t try to fix it yourself.

An experienced electrician knows exactly what they’re doing and can handle these sorts of issues safely and efficiently.

Remember folks, maintaining an electrical service panel isn’t just about saving money on repairs down the line (although that’s definitely a plus!). It’s also about keeping you and your family safe from potential hazards like fires, electrical shocks, or poor indoor air quality.

So don’t be a stranger to your panel box. Get to know it, take care of it, and it’ll take care of you in return.

Troubleshooting Common Electrical Panel Problems

Common Electrical Panel Snags

We’ve all been there. You’re in the middle of a riveting movie, and bam, lights out. Tripped breakers or flickering lights are common problems with electrical panels. These issues can seriously cramp your style.

  • Tripped Breakers: This happens when your circuit breaker panel can’t handle the amount of electricity flowing through it. It’s like trying to fit an elephant into a Mini Cooper, ain’t gonna happen!
  • Flickering Lights: This is often due to loose electrical wiring within your circuit breakers. Think of it as a game of telephone with bad connections, messages (or in this case, electricity) get lost along the way.

How to Reset a Tripped Breaker

Resetting a tripped breaker isn’t rocket science, but safety first folks! Make sure you’re not standing in water and you’re wearing rubber-soled shoes.

  1. Find your main breaker panel.
  2. Identify the tripped breaker switch; it’ll be in the “off” position.
  3. Flip the switch back to “on”.

If it trips again immediately, Houston we have a problem! It could indicate overloading circuits or short circuits in your system.

Time for an Upgrade?

Like that old pair of jeans from high school, sometimes we need to accept when things are past their prime. If you’ve got an outdated fuse box instead of circuit breakers or if you’re experiencing frequent power outages, electric shocks, or AC repair issues, it might be time for an upgrade.

Remember: An outdated electrical panel isn’t just inconvenient—it can be dangerous for the future of AC!

Warning Signs That Need Immediate Attention

Some signs scream “Engage Emergency Services! Call an electrician ASAP!” more than others.

  • Furnace Replacement Signs: If your fuse boxes have that “just burnt toast” smell, don’t ignore these potential signs of needing a furnace replacement. It could be a sign of an overheating panel or wire, indicating potential Furnace Replacement Signs or issues with the Cooling Tech.
  • Hot to the Touch: Your circuit breaker panel should never feel hot. If it does, it’s like your car’s check engine light—it needs immediate attention!
  • Frequent Tripping: If you’re resetting breakers more frequently than you’re checking Instagram, there’s probably a ground fault or short circuit issue at play.

Remember, folks: When in doubt, call a professional! Messing with electrical panels without proper knowledge is like trying to tame a lion—you might get seriously hurt!

Importance of Regular Electrician Checkups

Alright, we’ve covered a lot of ground in this installation guide, from the nitty-gritty of installing an electrical panel to keeping it in tip-top shape. Remember, regular checkups by a certified electrician can save you from a world of hurt down the line. They’re like your panel’s personal fitness trainer, ensuring it stays fit and ready for action.

Don’t let your air conditioning and air ducts gather dust – keep them well-maintained with regular duct cleaning. Use air cleaners for clean air ducts. And if you run into any hiccups along the way, don’t sweat it! Our troubleshooting guide has got your back. So go ahead, roll up those sleeves and show that electrical panel who’s boss! If you need professional help or advice regarding Emergency Services or Quick Response, don’t hesitate to reach out to us for IAQ Solutions.

FAQs

What are the essential tools needed for installing an electrical panel?

The essential tools include screwdrivers, wire strippers, pliers, multimeter and circuit finder among others. You’ll also need safety gear such as gloves and safety glasses.

How often should I get my electrical panel checked by a professional?

It is recommended that you have your electrical panel inspected at least once every three years by a licensed electrician to ensure its optimal performance.

Where should I install my electrical panel?

Your electrical panel should be easily accessible but away from high traffic areas in your home. The National Electrical Code (NEC) provides guidelines on where to install panels, including during AC Installation.

What are some common problems with electrical panels?

Common issues include circuit breakers frequently tripping, burn marks or signs of overheating on the panel box and flickering lights in your home.

How can I safely maintain my electrical panel?

Regular cleaning and checking for any signs of damage is key for Air Purification and IAQ Improvement. However, remember to always turn off the main power before performing any maintenance tasks.

Navigating the market for home generators, including whole house, portable, inverter, and solar generators, can be as complex as the intricate wiring they connect to. This article serves as a comprehensive guide, offering you helpful tips and essential information on technical products, including product names, performance metrics, and the unique selling points (USP) that set some models apart. Our reviews team has curated these tools to ensure you have access to reliable advice. Our reviews team frames your buying journey with helpful tips and key test points like temperature resilience and parallel phase compatibility for products such as panels, ensuring you make an informed decision grounded in thorough research without getting lost in technical jargon or aggressive business referrals.

From assessing the right portable generator size to understanding installation nuances, our guide places a clear emphasis on reliability and efficiency with electric generators direct. We also consider the benefits of solar generators and inverter generators for various applications. Whether preparing for unexpected power outages or ensuring seamless daily operations, this guide illuminates the path to purchasing a home generator, be it portable generators, standby generators, or solar generators, that aligns with your needs. Explore Generac options to find the right fit for your power requirements.

Understanding Whole House Generators

Home Power Essentials

Choosing the right generator for your home is crucial. Generac standby and portable generators, equipped with automatic transfer switches and parallel panels, offer different benefits for whole-house coverage. Standby generators automatically power your home during an outage. Generac portable inverter generators, while more flexible than automatic transfer switches, require manual setup and operation as opposed to the convenience offered by Power Equipment Direct.

Noise levels are important to consider. Some areas have strict noise regulations that could influence your choice of portable generators, standby generators, or solar generators when shopping at Electric Generators Direct. Always check local laws before making a purchase.

Long-term reliability of home standby generators hinges on good warranty and technical maintenance services for the product. A robust warranty can save you money on repairs for your Generac home standby generator, ensuring your home generator product remains reliable over time. Regular maintenance ensures your standby or portable generator, including Generac and solar generators, will be ready when you need it most.

Generator Types Explained

Standby and portable generators fulfill different needs. Standby home generators provide seamless power delivery but at a higher cost compared to portable generators, inverters, and solar generators. Portable models, unlike a home standby generator, are less expensive but require manual intervention to start, as opposed to remote or solar generators.

Inverter generators represent advanced technology in power generation. Solar generators and portable generators are quieter and more fuel-efficient than traditional diesel models, making them ideal for sensitive electronics and as an alternative to a home standby generator.

Installation costs can vary widely based on several factors:

  • Permits
  • Labor
  • Additional components like transfer switches or gas lines

Some energy-efficient solar generators and portable generators may qualify for tax incentives or rebates, lowering overall costs when purchased through retailers like Electric Generators Direct for home generator needs.

Local climate affects both generator operation and housing requirements:

  • Extreme cold may necessitate an insulated enclosure.
  • High humidity areas might require rust-resistant materials.

Cost Calculation Factors

Installation of a home generator is not just about purchasing the unit; additional expenses include accessories, commercial-grade wiring, and portable generators setup costs.

  1. Permits from local authorities.
  2. Labor charges by qualified technicians.
  3. Extra components like fuel tanks or concrete pads.

Rebates or tax incentives can significantly reduce net costs:

  • Federal credits often apply to energy-efficient systems.
  • State-level incentives vary; research is essential.

Climate considerations impact installation complexity and cost:

  • Cold regions might need heated enclosures for reliable startup.
  • Coastal areas could require corrosion-resistant materials to combat salt air, ensuring durability for nav systems, diesel engines, and marine accessories as highlighted in this article.

Climate Impact Considerations

Your local weather patterns dictate specific generator features:

  • In hot climates, adequate cooling systems prevent overheating.
  • Areas prone to flooding may need elevated installations for portable generators and standby generators, including home standby generator accessories, to protect against water damage.

When selecting housing for your portable generators or standby generators, consider the environmental conditions to protect your investment. Sites like Electric Generators Direct offer a variety of options, including those from trusted brands like Generac, to ensure your generator is well-sheltered.

  • Soundproofing measures in quiet neighborhoods.
  • Secure anchoring for standby generators and portable generators in regions with high winds or seismic activity is essential. Refer to our guide for proper nav practices.

Reasons to Invest in a Whole House Generator

Generac whole house generators offer uninterrupted power and can increase home value, while portable Cummins units provide flexibility and amp up energy security. They provide safety, convenience, and financial benefits.

Uninterrupted Power Outages

Top manufacturers like Generac, Kohler, and Cummins are known for reliability in portable generators, home generator solutions, and standby generators, available through Electric Generators Direct. These companies, including Generac, have built reputations on keeping lights on with standby generators and portable generators when it matters most, often sourced from Electric Generators Direct. Consumer reviews often highlight performance during long outages. People feel safer knowing their generator is dependable.

Certifications from UL, CSA, or ETL are crucial for safety when selecting portable generators, standby generators, and their accessories from Electric Generators Direct. They show that a product meets strict standards. When choosing between portable generators and standby generators from Electric Generators Direct, such as a Generac model, these certifications should be part of the decision-making process.

The benefits of uninterrupted power from standby generators and portable generators go beyond just keeping appliances running. Electric Generators Direct offers a range of Generac options to ensure reliability. It’s about security systems staying active with standby generators and medical devices working without fail, ensuring power continuity without the need for manual intervention, especially from brands like Generac. Convenience is not having to reset clocks or miss important work deadlines due to power issues with standby generators and portable generators from Electric Generators Direct, along with their essential accessories.

Enhancing Home Value

Generac generators can be a portable power investment that pays off for commercial use down the line. Financing options make them accessible now. Loans or payment plans from vendors ease the initial cost burden of commercial accessories like portable power generators.

Insurance implications need consideration too. Some insurance policies may cover portable generators and standby generators damage or failures; others might not. Brands like Generac and retailers such as Electric Generators Direct could be relevant in this context. Understanding your coverage could influence your choice of generator.

Ongoing expenses include fuel costs and maintenance checks. Budgeting for portable generators and standby generators ensures your electric generators direct stays in top condition over time, including necessary accessories.

Long-term investment insights suggest that adding a standby generator as a whole house power solution can boost property value and ensure ample amp capacity during outages, unlike portable generators. It’s an attractive feature for potential home buyers who value power preparedness and comfort with commercial-grade accessories.

Determining Your Home Generator Needs

Assessing Home Energy Consumption

Calculating your home’s electrical load, measured in amps, is the first step in choosing between portable generators and standby generators to ensure reliable power for your whole house. This involves listing all the appliances and devices you want to power during an outage with your portable generators or standby generators, including the required amp and any accessories.

To calculate your power consumption, add up the wattage of these accessories and portable generators, considering their amp ratings. Calculating the total amps gives you a baseline for the portable or standby generator size needed to power your essentials. Remember that some appliances, like air conditioners, need more power to start than to run, which is important to consider when selecting portable generators or standby generators. Ensure the generator’s amp rating and available accessories match your power requirements.

Your utility bill can also offer insights into your monthly usage, serving as a guide to the power needs for portable generators in commercial settings. However, it’s essential to consider not just average power use but also peak amp demand too, particularly when selecting standby generators or portable generators. Peak demand reflects the maximum power you’ll need at any one time, critical for a generator buyer considering both portable generators and standby generators in terms of amp capacity.

Sizing Your Generator Correctly

Selecting a portable or standby generator with the appropriate power capacity and amp rating is crucial for both efficiency and safety. Choosing the right size for portable generators or standby generators is crucial; an undersized unit won’t meet your power needs, while an oversized one wastes fuel and money. This guide helps you find the balance.

The right size accessories balance between too small and too large, ensuring optimal power. Follow this guide to find the perfect amp. It should handle your peak power load plus a margin for error, whether using amp ratings for standby generators or portable generators. Professionals often recommend adding a 20% buffer to your calculated peak amp demand when sizing standby and portable generators for reliable power coverage.

A correctly sized generator ensures reliability without overworking itself. This guide also reduces wear and tear on portable generators, enhancing their power output and amp capacity, thereby extending their lifespan and performance.

Safety is another reason for precise sizing. Overloading portable or standby generators can cause overheating or failure, risking power loss and hazards to both equipment and residents, especially when transfer switches are not utilized properly.

Options and Features to Consider

Choosing the right whole house generator involves understanding fuel types, essential features, and deciding between portable generators and standby generators to ensure adequate power and amp capacity. It’s about safety, convenience, and ensuring you have power when you need it with portable generators or standby generators, equipped with the right amp capacity and transfer switches.

Fuel Types Availability

Whole house generators run on various fuels. Each has its pros and cons.

Natural gas generators, a portable power solution, connect directly to your home’s gas line and may require transfer switches as outlined in this guide. Standby generators offer uninterrupted power supply but may not be as portable or available for every commercial application. Propane generators, known for their portable design and long shelf-life, offer a higher energy output per gallon than natural gas, making them ideal for commercial use and power amplification. However, they require storage tanks.

Diesel generators are known for their reliability as a standby power source and efficiency in fuel consumption, with portable designs often incorporating a robust amp capacity. But diesel, often used for standby generators and portable commercial power sources, is pricier than other fuels and might not be as readily available during emergencies.

Dual-fuel standby generators offer flexibility for both commercial and portable use by running on two different types of power sources, typically gasoline or propane. This standby generator can be a portable lifesaver, delivering ample power if one fuel source becomes scarce during a prolonged outage.

Essential Features Home Generators

When investing in a home generator, prioritize features that enhance safety and convenience, including standby generators with ample power and portable options with sufficient amp ratings.

Automatic Transfer Switches

An automatic transfer switch (ATS) is critical for seamless power transition between standby generators and portable sources, ensuring the correct amp flow and PTO operation. The transfer switch automatically shifts your home’s power source from the grid to the standby generator when an outage occurs, then back again when normal power resumes, ensuring your portable amp stays powered.

The benefits of an ATS include protection of your electrical system from overload by managing the power load distribution among different circuits, seamlessly integrating with standby generators, and supporting essential amp requirements while coordinating PTO functions. This feature also eliminates the need for manual operation of portable standby generators, which can be both inconvenient and hazardous during adverse weather conditions, ensuring uninterrupted power for commercial use.

Remote Monitoring Systems

Remote monitoring systems represent state-of-the-art technology in standby generator management, ensuring portable power solutions for RVs are always ready to use.

Standby generators enable homeowners to manage their power source remotely through portable device applications, such as smartphones or computers, ensuring continuous commercial and residential energy supply. You can monitor your standby generators or portable power units’ status via nav, receive maintenance alerts, and even start or stop your generator remotely – ensuring peace of mind whether you’re at home or away.

Remote monitoring systems are particularly useful for those who travel frequently with their RV or have vacation homes equipped with standby generators that may experience power outages while unoccupied.

Financial Considerations

Initial Purchase Costs

Upfront expenses are significant. Whole house generators require a substantial initial investment. Prices vary widely based on power capacity and brand. A commercial-grade unit can cost several thousand dollars. Installation of standby generators adds to this cost, often equaling or surpassing the generator’s price, whether it’s for portable or commercial power needs.

Professional installation is critical for safety and efficiency. This power installation process for standby generators involves electrical and possibly gas connections, which must meet local codes for both commercial and portable units. It’s not just about purchasing a portable unit; it’s ensuring it’s properly integrated with commercial-grade power transfer into your home.

Installation Expenses

Installation costs depend on complexity. Homes without existing infrastructure for commercial standby generators may face higher fees for additional portable power work needed. Factors like permits, labor rates, necessary site preparation, and commercial power PTO transfer capabilities affect the total amount spent.

The more complex your commercial energy needs, the more intricate and costly the installation of standby generators or portable power solutions will be. It’s important to get multiple quotes to fully understand these commercial PTO power expenses with NAV considerations.

Operating Costs

Running a generator incurs ongoing expenses. Fuel consumption is a major factor in operating costs for whole house generators, whether they are portable units for home use or installed for commercial applications. Natural gas standby generators might tie into existing utility lines, while propane or diesel portable models require storage tanks for backup power in commercial settings.

The type of fuel impacts both budget and practicality over time for commercial power sources, including portable and standby generators. Efficiency varies between portable RV models, affecting how much power you’ll spend on fuel during each commercial use.

Maintenance Expenses

Regular maintenance ensures longevity. Like any machine with moving parts, whole house generators, including portable and RV models, need routine check-ups to operate reliably as a standby power source when needed most.

Budgeting for annual servicing by a professional is wise. These costs for maintaining power can include oil changes, filter replacements, and general inspections to catch issues early in standby generators and RVs, ensuring efficient transfer of energy.

Selecting the Perfect Home Generator

Selecting a whole house generator involves understanding brand reputations, warranty details, and comparing standby generators to portable options, ensuring adequate power with navigation (nav) ease. These factors ensure reliable power backup and customer satisfaction.

Ranking Top Brands

Industry leaders stand out for their reliability and performance. Generac is often at the forefront, known for its durable, portable home generators with standby power and integrated nav systems. When researching, consider these top brands:

  • Generac
  • Kohler
  • Briggs & Stratton

Each has strengths in energy efficiency, longevity, and technological advancements, including power management, standby generators’ reliability, portable solutions’ flexibility, and NAV system integration. For example, Generac offers portable standby generators with Wi-Fi capabilities, allowing remote monitoring of your RV’s power status.

Customer reviews often highlight ease of maintenance and fuel efficiency as key decision factors for portable and standby generators, with particular praise for user-friendly power and nav features. When considering a purchase, especially for RV accessories or NAV systems, ensure the brand’s product lineup has consistent positive feedback and sufficient PTO power options.

Warranty Considerations

Warranty length signals manufacturer confidence in their product. A longer warranty period can indicate higher quality and durability in portable and standby generators, including those designed for RV use. Top brands of standby generators offer warranties that span several years, ensuring a reliable power source and providing peace of mind, with portable options available for easy nav.

When examining warranties, note coverage specifics:

  • Parts replacement
  • Labor costs
  • Travel charges for service calls

Generators are complex machines requiring professional servicing. Ensure that the warranty for standby generators includes comprehensive support for portable power and PTO to avoid unexpected expenses.

Customer service holds the power to influence post-purchase satisfaction, ensuring a smooth transfer of information and support. Additionally, PTO (Paid Time Off) policies can impact employee availability to address customer needs, while understanding NAV (Net Asset Value) can be vital in financial services to maintain client trust and service quality. Responsive support teams can significantly ease the stress associated with maintenance issues or technical questions about power, standby generators, portable solutions, and transfer mechanisms.

Customer Service Quality

Responsive customer service proves invaluable during emergencies, such as power outages, or routine inquiries about portable and standby generators with integrated navigation (nav) capabilities. The best electric generators, whether portable or standby, come backed by robust support networks offering NAV and power assistance.

  • 24/7 customer helplines
  • Online troubleshooting guides
  • Network of certified technicians

For instance, Generac, known for its standby generators, boasts a wide network of service providers ensuring power is readily available when needed, including portable options and NAV support.

Before purchasing a standby or portable generator, check if the company has garnered awards or recognition for their customer service standards in the power industry, including NAV-related accolades. This can be a power indicator of how well they will treat you after your RV purchase with portable nav features.

Installation and Maintenance

Before a whole house generator, often referred to as a standby generator, becomes part of your power system at home, preparation for installation is crucial, including understanding the differences between portable generators and the navigation (nav) of local installation regulations. Post-installation, regular maintenance ensures longevity and reliability.

Preparing for Installation

Homeowners must be proactive before their generator arrives. Identifying the installation location is step one. The portable standby generators should be easily accessible for maintenance and far enough from windows to prevent carbon monoxide entry, ensuring reliable nav power. Next, prepare the foundation. Generators need a stable concrete pad to sit on.

Consulting with professionals is vital. They ensure proper electrical wiring and gas line connections. The right team will handle permits, follow local codes, and secure inspections for your portable power solutions in your RV with seamless nav integration.

Equipment like an air conditioner or refrigerator dictates power needs, whether you’re considering portable generators, standby options, or for your RV. Share appliance details with installers to avoid overloading circuits.

Maintaining Your Investment

Regular service keeps generators reliable during outages. Maintenance of both standby and portable generators includes checking oil levels, changing power filters, and inspecting batteries for reliable power generation.

Follow the manufacturer’s manual for schedules and tasks. Typically, professional servicing is recommended annually or after 200 hours of use for both portable and standby power generators.

Monitor performance indicators like voltage output and rpm regularly. Anomalies often signal the need for service.

Household owners can perform simple tasks like cleaning debris from around the portable generators or testing operation monthly to ensure reliable power during navigation (nav) tasks.

Safety Protocols and Legalities

Safety is paramount when operating a whole house generator. Understanding the best practices for safe operation of both portable and standby generators, and adhering to local laws, are essential steps in owning and using a generator for power.

Generator Safety Best Practices

Generators, whether portable, standby, or for RV use, are powerful tools that can pose risks if not used properly. Carbon monoxide poisoning, electrical shock, and fire hazards are among the top concerns when using portable generators and standby power systems. To prevent these dangers:

  • Ensure proper ventilation to avoid carbon monoxide buildup.
  • Keep portable or standby generators dry and operate on a dry surface under an open structure, ensuring reliable power and safe navigation (nav) systems.
  • Install carbon monoxide detectors in your home.

Regular maintenance also plays a crucial role in safety. A well-maintained portable generator or standby power system is less likely to malfunction, reducing the risk of accidents.

Complying with Laws Regulations

Local codes dictate how and where you can install your power generator for your RV, including considerations for the nav system. These regulations ensure that the installation of standby generators does not pose any threat to public safety, infringe on community standards, or disrupt power and navigation (nav) systems. For instance:

  • Some RV areas require a certain distance between power generators and property lines, even when they are on standby or in nav mode.
  • Permits may be necessary before installation begins.
  • Noise ordinances could affect how and when you use your power generator, especially if it’s meant for standby or nav applications.

Failing to comply with power and nav laws can result in fines or legal action, especially if standby generators are not properly maintained. Before purchasing a whole house generator, it’s essential to consult with local authorities or hire professionals familiar with power regulations and standby generator requirements, including nav considerations.

Looking to the Future of Backup Power

Renewable energy is shaping the future of backup power. Technological innovations are introducing hybrid generators that combine sustainability with reliable standby power and advanced nav systems.

Exploring Renewable Energy Options

Solar-powered generators are a leap towards green living. They harness sunlight, converting it into electricity without emissions. This shift towards sustainable solutions reflects a global eco-conscious trend, integrating power standby generators with advanced nav systems. Homeowners now seek standby generators for backup power that doesn’t compromise environmental values, ensuring their RV and nav systems remain operational.

The adoption of solar power for RV use is not just about being environment-friendly; it’s also about ensuring a reliable standby source of energy, with generators seamlessly integrated into the nav systems. It’s also a long-term investment in energy independence. Solar panels paired with standby generators ensure continuous power supply, even during outages, ideal for nav systems and RV use.

Costs for solar generators have decreased significantly over the years, providing a sustainable source of power for RV and marine (nav) applications. Tax incentives and rebates further sweeten the deal for potential RV buyers considering power generators with NAV capabilities. As a result, more people can afford this renewable power option for their whole house generators, ensuring their RV systems remain operational with efficient NAV capabilities even in standby mode.

Technological Advancements and Hybrid Systems

The generator industry is evolving rapidly with new technologies. Hybrid systems, acting as standby generators, are at the forefront of this power revolution, offering efficiency and adaptability with integrated NAV capabilities.

Hybrid generators, often utilized in RV applications, typically combine traditional fuel sources with battery storage capabilities, providing a reliable power source with efficient standby and nav system support. This RV-ready dual approach provides immediate standby power from the generators while storing excess energy in batteries for later use, seamlessly integrating with your nav system for efficient energy management.

Battery technology has seen remarkable improvements lately. Modern RV batteries offer higher power capacities and longer lifespans than their predecessors, suitable for powering onboard generators and nav systems. Hybrid generators are also becoming more affordable, making power systems with integrated nav accessible to a wider audience.

These advancements in power mean hybrid generators with enhanced nav capabilities can operate more quietly and efficiently than ever before. Generators are smart investments for those looking to balance power performance with environmental responsibility, especially when integrated with nav systems.

Conclusion

Additional Resources

Expert Advice Access

Seeking professional guidance is essential when considering a whole house generator to ensure reliable power and seamless integration with your home’s nav system. Experts can provide insights tailored to your specific needs. They consider factors like the size of your home, energy requirements, local weather patterns, and the capacity of power generators, including nav capabilities. This personalized advice ensures you choose a generator with the right nav features that fits your emergency power needs.

Information Rich Sources

Numerous online platforms offer in-depth information on whole house generators, detailing their power capabilities and providing navigation tools to compare features. These nav-friendly websites often feature power equipment buying guides, reviews, and comparison charts for generators. They help you understand the different types of power generators, their features, and which might be best for your situation, including nav systems. Always look for power sources that are well-regarded and trustworthy, with reliable nav systems and generators.

Tools and Accessories

Understanding the right tools, accessories, and power generators for installation, maintenance, and nav is crucial. When purchasing power generators, you may need transfer switches, covers, or maintenance kits, along with a reliable nav system for easy monitoring. These accessories ensure safe operation and longevity of your equipment, enhancing power efficiency and integrating seamlessly with your nav systems and generators. Make sure to include them in your budget.

Support Systems

After-sales support is a crucial aspect of owning a whole house generator, ensuring reliable power and efficient navigation through any maintenance needs. Look for manufacturers or retailers of generators that offer robust customer service and reliable power solutions with integrated nav systems. This includes installation support, warranty services, and repair options. Good support from power generators’ nav systems can save you time and money if issues arise.

Supply Considerations

The type of fuel supply your generator will use impacts its power efficiency and convenience, especially if it’s integrated with a nav system. Some generators, essential for providing power, run on natural gas, others on propane or diesel, with nav systems often guiding their distribution. Each type of power generator has its own storage requirements and associated costs, as well as specific navigation (nav) considerations. Consider the availability of these fuels in your area before making a decision on generators, ensuring they can provide the necessary power and integrate with your nav systems.

Storage Solutions

If you opt for generators that require a fuel type like propane or diesel for power, safe storage solutions with proper nav are necessary. When installing generators, ensure your fuel tanks meet safety regulations and are adequate for your power needs, including nav systems if applicable. Proper storage of generators ensures a reliable power source during emergencies without risking safety and helps maintain the integrity of your nav systems.

Assessing Needs

Before buying a whole house generator, assess your power needs accurately to ensure it meets your navigation system’s requirements. To calculate the total wattage required for essential appliances and devices during an outage, consider the capacity of power generators and incorporate nav tools to manage energy distribution effectively. This helps determine the size and amp rating required for your power generator, ensuring it meets your nav system’s needs.

Emergency Preparedness

A whole house generator ensures power continuity and is a key component of a broader emergency preparedness plan, including nav systems. It’s not just about having power generators; it’s about ensuring continuity of daily life and nav systems during unforeseen events. Consider how a generator, an essential source of power during outages, integrates with other emergency supplies like first aid kits, food storage, water purification systems, and navigation (nav) tools.

In conclusion, when considering purchasing a whole house generator for reliable power, it’s vital to utilize additional resources and nav tools available to make an informed decision. From seeking expert advice on generators to understanding supply considerations for nav systems and assessing your specific needs—each step is crucial in choosing the right backup power solution for your home. Remember that this investment not only provides convenience but also security in times of emergency.

Every year, thousands of homeowners who are DIY enthusiasts get more than they bargained for when dabbling in home electrical repairs—shocks, burns, and even fires. It’s crucial to have a licensed electrician or a registered electrician handle such tasks to ensure safety. Only a qualified electrician has the expertise to avoid these dangerous pitfalls. Recognizing these electrical safety tips and rules is crucial before you even think about touching a wire to prevent electrical shock and reduce the risk of an electrical fire hazard. Your safety must always trump the urge to quickly fix that flickering light or malfunctioning outlet, potentially an electrical fire hazard. Ensure electrical repairs are handled by a registered electrician to maintain the integrity of your electrical equipment. Understanding the basics of your home’s electrical system isn’t just wise—it’s essential for anyone handling appliances or replacing bulbs with the intent to tinker. Following safety tips and knowing when repairs are needed can prevent mishaps. And remember, flipping off the power at the breaker isn’t just a suggestion; it’s step one on the ladder of safe DIY electrical work on appliances and their repairs, including handling cords.

Engaging with electricity requires respect and adherence to electrical safety rules; it’s not your average weekend project involving electrical repairs or handling electrical equipment. Always follow essential electrical safety tips to prevent hazards. As you prepare to tighten those wires or install that new appliance, keep these DIY electrical safety tips top of mind—they might just save your life. Always check the cord for damage before starting repairs, ensuring a secure and safe power connection.

Essential Protective Gear for Homeowners

Safety gear is a must when dealing with electricity. It shields you from shocks, burns, and other nasty surprises when handling appliances and electrical equipment, following electrical safety tips.

Rubber-Soled Shoes

Ever heard the saying, “Stay grounded“? Well, that’s top advice when working with electricity. Rubber-soled shoes are your best friends here. They maintain your electrical safety by keeping you insulated and not conducting any zappy business up through your feet. This simple step can be a real lifesaver.

Insulated Gloves

Next on our safety checklist: gloves. But not just any gloves—insulated ones. These bad boys help you grip wires with electrical safety, ensuring you can work without fear of getting shocked. Think of them as your personal force field for your hands while tinkering with those home fixtures or appliances.

Safety Goggles On

Sparks fly? No problem—if you’ve got your goggles on! Your peepers need protection from unexpected sparks or debris that come with electrical work. Strap on some safety goggles to keep your eyes safe and sound while you’re playing electrician at home.

Fire Extinguisher Ready

Now, let’s talk about being prepared for the worst-case scenario—a fire. Having a fire extinguisher in reach isn’t paranoid; it’s smart. Place one nearby before you even think about touching that breaker panel or messing around with surge protectors.

Step-by-Step Electrical Safety Checklist

Verify Power Is Off

Always check the power. A voltage tester is your best friend here.

Using a voltage tester seems simple, but it’s a lifesaver. It tells you if electricity is still zapping through the wires. You don’t want any surprises when dealing with electricity.

Inspect Tools and Cords

Before starting, give your tools a once-over. Frayed cords or damaged equipment can spell disaster.

Look closely at each tool and cord. If they’re worn out or look sketchy, don’t use them. Electricity isn’t something to gamble with.

Secure Loose Clothing

Loose threads can cause big problems in small spaces. Keep your outfit snug and jewelry-free.

Tuck in that shirt and roll up those sleeves. And rings or bracelets? Take ’em off! They could conduct electricity, which is bad news for you.

Double-Check Connections

Ensure all wire connections are tight and correct. This isn’t just about order; it’s about safety.

A loose wire is like an open invitation for trouble. Go over them twice to make sure everything’s snug as a bug in a rug.

Common Household Electrical Hazards

In our homes, everyday items can become electrical hazards if not managed properly. Overloaded outlets, damaged cords, and outdated systems are just a few examples of risks that could lead to serious accidents.

Overloaded Power Strips

Power strips are handy but can turn into an electrical fire hazard when packed with too many plugs. It’s tempting to plug in all your gadgets at once, but this can cause fires.

  • Use power strips with built-in overload protection.
  • Don’t daisy-chain multiple power strips together.

Frayed Cords Danger

Cords that look chewed up or worn out aren’t just ugly; they’re shock risks waiting to happen. Replace them before they zap you or someone else.

  • Inspect cords regularly for damage.
  • Unplug appliances with frayed wires immediately.

Water and Outlets Mix

Water near an electrical outlet is like inviting trouble over for tea—it’s a bad idea. Keep areas around sockets bone-dry to avoid the zap of your life.

  • Never handle appliances with wet hands.
  • Ensure bathrooms and kitchens have GFCI outlets.

Update Outdated Wiring

Old wiring wasn’t made for today’s appliance-heavy world. It might be time for an upgrade if flickering lights and tripped breakers are common in your house.

  • Have a professional assess old wiring systems.
  • Consider rewiring if your home is over 20 years old.

Here’s the scoop: Electrical safety isn’t rocket science, but it sure is important! Let’s dig into some potential hazards lurking around the corner in every home sweet home.

Power strips seem harmless enough until they’re overloaded and start an electrical fire. Ever seen one go up in flames? Not pretty—and definitely not safe. To keep things chill:

Imagine plugging in your killer sound system only to get zapped by a frayed cord—that’d be a real buzzkill! And it’s not just about getting shocked; those rogue wires could spark an electrical fire faster than you can say “fire extinguisher.”

And then there’s water—nature’s conductor—hanging out dangerously close to your electrical outlets. Picture this: You’re jamming out on air guitar after a shower, reach for the hair dryer next to a puddle, and BAM! Electrocution city!

Last up on our electric avenue tour: outdated wiring playing hide-and-seek behind walls. It might have been top-notch back when bell-bottoms were cool, but now? Not so much, especially when modern appliances join the party.

So what do you do? For starters:

Now don’t let these potential hazards scare you off from enjoying all the electric-powered goodies at home. Just remember these tips:

You’ve got this! With these savvy safety moves up your sleeve, you’ll keep those pesky potential hazards in check while keeping your pad powered up safely.

GFCI Outlets: Self-Testing Guide

GFCIs are crucial in preventing shock, and testing them is simple. They belong in any place with moisture, and if they fail, replacing them is a must.

Monthly Testing Ritual

Keep your home safe by checking your GFCIs every month. It’s easy as pie—just press the “Test” button, then hit “Reset.” This little task is like a monthly health check-up for your house’s electrical system.

Wet Area Protection

Why are GFCIs a big deal for places like kitchens and bathrooms? Water conducts electricity super well. So, these outlets are lifesavers.

  • Kitchen counters
  • Bathroom walls
  • Laundry areas
  • Outdoor spaces

Immediate Replacement Rule

Stumbled upon a dead GFCI during your test? Don’t shrug it off! A non-working outlet can leave you unprotected from shock or worse. Grab a new one pronto and swap it out—or call in an electrician if DIY isn’t your jam.

Resetting Know-How

So you’ve tested or used your GFCI and now it’s tripped—no sweat! Here’s how to get things back to normal:

  1. Press the “Reset” button firmly.
  2. If it doesn’t stay put, there might be an issue.
  3. Unplug all devices connected to the outlet.
  4. Try resetting again.
  5. If it still won’t reset, time for a new GFCI!

Remember that these aren’t just handy tips—they’re about keeping everyone at home safe from electrical mishaps. By ensuring your outlets can prove their worth in wet conditions and knowing how to test them regularly, you’re taking charge of your home’s electrical safety game.

Tips for Preventing Circuit Overloads

To keep your home safe, managing electrical loads is key. It’s all about understanding and respecting your circuits’ limits.

One Appliance Per Outlet

Plugging in too many gadgets? Hold up! Every outlet group in your house was designed to handle a certain load. When you plug in that mega-powerful microwave, make sure it’s riding solo on the circuit. This isn’t just a pro tip; it’s a must-do to prevent overheating.

  • Fridges, ovens, and heaters are high-wattage hogs.
  • They need their own space, so give them an exclusive outlet.

Know Your Capacity

Ever peeked inside your breaker box? It’s like the brain of your home’s electrical system. Each switch controls a different part of your house. Get to know which does what and label them clearly. This way, you won’t accidentally overload a circuit because you’ll know exactly what each one can handle.

  • Check out the manufacturer’s instructions for correct wattage.
  • Label breakers with stickers or a marker – whatever works!

Unplug What’s Not Used

Got chargers or appliances just hanging around plugged in? They’re still drawing power – that’s phantom load right there. These sneaky energy suckers add unnecessary stress on your circuits. So if you’re not using it, unplug it!

  • Toasters, coffee makers, and game consoles often fall into this category.
  • Make unplugging stuff part of your nightly routine.

Outlet Heat Checks

Outlets shouldn’t be hot to the touch – if they are, Houston, we have a problem! Regularly feeling up your outlets might seem weird but trust me; it can save you from serious trouble down the line.

  • If an outlet feels warm, switch off the breaker immediately.
  • Call in a pro if overheating persists – better safe than sorry!

Remember these tips next time you’re about to max out those outlets:

  1. One big player per outlet group keeps things chill.
  2. Learning and labeling help avoid accidental overloads.
  3. Unplugging unused items cuts down on hidden power drains.
  4. A quick touch test can catch an overload before it catches fire.

Staying mindful of how much juice you’re pulling will keep those circuits cool as cucumbers and prevent any potential meltdown—literal or figurative—in your cozy abode.

When to Hire a Professional Electrician

Unsure About Wiring

If wiring diagrams look like ancient hieroglyphs, pause. Guesswork in electrical DIY can lead to shocking outcomes, literally.

  • Call an electrician: A qualified electrician deciphers complex schematics with ease.
  • Safety first: They ensure installations are done without putting anyone at risk.

Permits and Codes

Permit puzzles? Let pros handle them. Registered electricians navigate the maze of code regulations effortlessly.

  • Professional expertise: They know what’s up-to-code, avoiding legal headaches later.
  • Peace of mind: You rest easy knowing everything’s by the book.

Major Installations

Big project on your hands? Tread lightly here. Major electrical installations are not for the faint-hearted or untrained.

  • Complexity: These tasks often involve intricate systems that require precise knowledge.
  • Risk factors: Mistakes can mean serious injury or property damage.

Smell Something Burning?

Burning smells and sparks aren’t part of home ambiance. These signs scream for immediate professional attention.

  • Urgent response needed: A licensed electrician can identify and fix potentially dangerous issues swiftly.
  • Don’t delay: Waiting could escalate risks exponentially.

Adopting Electrical Safety Practices

Wrapping up, remember that your home is your castle, and like any good fortress, it needs solid defenses—especially against electrical mishaps. By donning the right gear, ticking off safety checks, spotting hazards early on, and understanding your GFCIs and circuit loads, you’re well on your way to keeping your domestic kingdom safe from electrical dragons. And hey, there’s no shame in calling in the knights—the professional electricians—if the battle gets too fierce.

So grab those rubber-soled shoes and keep this guide handy. Your proactive steps today can prevent a shocking surprise tomorrow. If you’re ever unsure or if sparks start flying (and not in the romantic-comedy kind of way), reach out to a certified pro. They’ve got the skills to ensure everything stays wired right and tight. Now go forth and conquer those currents safely!

FAQs

What personal protective equipment should I use when doing DIY electrical work?

When tackling DIY electrical projects, always wear rubber-soled shoes for insulation and safety glasses to protect your eyes from sparks or debris. Consider using gloves with insulating properties when handling wires or electrical components.

How often should I test my GFCI outlets at home?

It’s recommended to test your GFCI outlets monthly to ensure they are functioning correctly. This simple self-test can be done by pressing the “Test” button followed by the “Reset” button on each outlet.

Can overloading circuits really cause fires?

Absolutely! Overloading circuits can lead to overheating, which may cause fires in extreme cases. Be mindful of how many devices you plug into a single circuit and consider spreading them out or using surge protectors.

When is it essential to hire a professional electrician?

Hire a professional electrician for complex projects that go beyond basic repairs or when dealing with high-voltage systems. It’s crucial for work that requires permits or inspections—and whenever you feel out of your depth—to ensure safety and compliance with local codes.

Are there any smartphone apps that can help me with electrical DIY tasks?

Yes! There are several smartphone apps available designed to assist homeowners with electrical DIY tasks—ranging from voltage calculators to augmented reality tools that help visualize wiring paths behind walls.

What’s one metaphorical tip for maintaining electrical safety at home?

Think of electricity like water running through pipes—it needs clear pathways without blockages (overloads) or leaks (faulty wiring). Maintain these ‘pipes’ well, and you’ll keep things flowing safely.

Is it worth investing in smart home devices for electrical safety?

Investing in smart home devices such as smart smoke detectors or automated shut-off systems can enhance electrical safety by providing real-time alerts and actions during potential emergencies.

When I first moved into my own place, the array of electrical outlet types, from pronged outlets to wall outlets, including the tamper-resistant receptacle near the bathroom and the circuit breaker in the kitchen, was a puzzle. One room had a standard three-prong receptacle, another boasted USB ports, and the kitchen had GFCI outlets with test buttons to prevent electrical hazards. Each was connected to a circuit breaker to support powerful appliances safely. It’s not just about plugging in; it’s about understanding electrical outlet types to power your gadgets safely and efficiently, especially when using powerful appliances. Knowing the right pronged outlets can help prevent electrical hazards. Understanding the different types of electrical receptacles is crucial for anyone dealing with electricity at home or work, including the use of a grounding wire, three-prong cord, and conductors. From recognizing the visual cues that differentiate one outlet from another, such as the number of prongs and whether it’s designed for amp outlets, to understanding why certain shapes, sizes, and conductors exist for single or three-phase power, each detail is tailored to specific electrical needs and safety standards. It’s all about matching your device’s plug with an appropriate electrical outlet works within your home’s wiring system. Ensure you choose the correct pronged outlet or prong outlet from the various electrical outlet types available.

Standard 15A and 20A Outlets

Understanding the difference between 15A outlets for everyday gadgets and 20A ones for more demanding equipment is crucial in managing the electric current in your home’s electrical system. You’ll find these standard NEMA outlets, with their familiar amp ratings and prong configurations, peppered throughout common spaces like lounges, snooze zones, and work hubs, ready to connect with various conductors.

Light-Duty Vs Heavy-Duty

Got a lamp or a laptop charger? They’re chill with a standard 15A outlet. These conductors are your home’s go-to for connecting to various electrical outlet types and powering up the usual tech through a prong outlet without breaking a sweat, all while handling the appropriate amp. The wire behind the walls that connects to these NEMA outlets is typically not too thick – it doesn’t need to be, as it’s designed to handle a specific amp load with adequate conductors and a secure prong connection.

But when you’ve got some serious gear, like that monster of an air compressor in your garage, you’ll want to buddy up with a 20A (amp) outlet equipped with a NEMA-certified prong and robust conductors. These beefier electrical outlets, acting as conductors, can handle the heat thanks to their ability to carry more current, measured in amps, without throwing a fit, even with a heavy-duty prong configuration.

Spotting the T-Shaped Slot

Ever notice that some outlets, with a NEMA designation, have this funky T-shaped slot on one side, indicating a prong configuration for higher amp circuits and an additional conductor? That’s not just for show – it’s like a secret handshake telling you it’s a NEMA 20A outlet with its unique prong and amp conductor design. This special electrical outlet means business; it’s ready to amp up those heavy-duty power tools or kitchen appliances with its robust prong configuration, adhering to NEMA standards for performance and safety.

Gauge Wire Matters

Let’s talk guts – the gauge wire, I mean. It might sound snoozy but stick with me. The thickness of the wire (that’s gauge) decides how much electrical current it can safely carry without getting all hot and bothered, whether it’s for a 3-prong plug, a high amp circuit, or a NEMA connector.

  • For most rooms where you’re just chilling or typing away on your computer, a thinner gauge wire leading to a standard NEMA electrical outlet with a two-prong, 15-amp capacity will do just fine.
  • But if we’re talking about areas where you’re gonna crank up something hefty, like a high-amp appliance, then we beef up the wires to make sure the electrical outlet—especially a NEMA type with the right prong configuration—stays cool under pressure.

Here’s why this matters:

  • Thicker wires reduce resistance; less resistance means less heat.
  • Less heat equals more safety with the right amp and NEMA ratings – nobody wants an unexpected indoor fireworks show!

So next time you plug in your microwave or space heater, give a silent nod to those NEMA-standard thicker wires keeping things safe behind your drywall.

Specialty Outlets: 30A and 50A

Understanding different types of electrical outlets, including NEMA standards, is crucial for safe and efficient power use. Specialty outlets like NEMA 30A and NEMA 50A are designed for specific high-power appliances, ensuring the right fit for energy demands.

Dryers and RVs

Most homes have a dedicated NEMA spot for the laundry machine. It’s that NEMA nook where you toss in dirty clothes and, with some soap and a push of a button, magic happens. But it’s not all about the soap or the spinning drum; it’s also about the juice that powers your dryer – electricity from a NEMA 30A outlet.

  • Dryers: They’re hefty eaters. That’s why they’re hooked up to a NEMA 30A outlet.
  • Some RVs, adhering to NEMA standards, require these homes-on-wheels also need a solid power source. You guessed it – they often plug into these same types of NEMA outlets.

High-Power Appliances

Step into any kitchen, and you’ll find a NEMA-certified oven or range. These aren’t just any appliances; they’re like the quarterbacks of kitchens, calling all the shots. And just like any star player, they need proper support – enter the 50A outlet.

  • Ranges: Whip up a feast? Your range has got your back, as long as there’s a beefy 50A outlet in play.
  • Large RVs: Bigger rigs mean more power needs. A 50A outlet provides enough oomph to keep everything running smoothly on those epic road trips.

Unique Configurations

Ever tried plugging headphones into a charging port? Doesn’t work, right? Same idea with specialty outlets – their unique shapes are like puzzle pieces that only fit with their matching partners.

These outlets have their own special configurations:

  • Prevent mix-ups: No shoving square pegs in round holes here.
  • Safety first: This design helps avoid electrical mishaps by making sure only suitable appliances get connected.

Imagine plugging in your mega-powered microwave into an outlet meant for your bedside lamp. Sounds like trouble waiting to happen! Thanks to these unique designs, that’s one less thing to worry about.

GFCI and Split Circuit Safety

Understanding different types of electrical outlets is crucial for ensuring safety and functionality in your home. GFCI outlets are essential in areas with moisture, while split circuits provide efficiency in kitchens.

Spot the GFCI

GFCIs, or ground fault circuit interrupters, are easy to identify. Look for the two buttons labeled “test” and “reset.” They’re not just any outlet; they’re lifesavers. You’ll typically find these guys hanging out where water’s a constant guest – think bathrooms, kitchens, garages, and outdoors. They’ve got one job: keeping you safe from electric shocks.

  • Found near water sources
  • Protect against electrical shock

Kitchen Power Duo

Split circuits are like the dynamic duos of the kitchen world. One outlet, but two separate circuits behind it. This means you can power your microwave and blender at the same time without tripping the circuit breaker. It’s all about balance – while one side takes a break with low-power tasks, the other can handle heavy-duty work.

  • Allows simultaneous appliance use
  • Prevents overloading single circuits

GFCI Vigilance

These gfci outlets aren’t just sitting pretty; they’re on constant watch. The moment they sense something off with the electrical flow – bam! They cut power faster than you can say “ground fault.” This quick action by our vigilant friend, the fault circuit interrupter, prevents potential disasters like fires or electrocution.

  • Monitors electricity continuously
  • Instantly cuts off power when necessary

Split Circuit Smarts

Think of split circuits as having a built-in traffic control system within each outlet. With this setup in your kitchen, it’s like having extra lanes on a highway during rush hour; everything moves along smoothly without any jams. So go ahead – whip up that feast without fear of tripping breakers!

  • Manages high kitchen electricity demand
  • Ensures smooth operation of multiple appliances

Safety First Always

Remember those specialty 30A and 50A outlets we talked about earlier? Well, gfci outlets and split circuits are another breed altogether focused on safety first. While those beefy 30A/50A ones power up big appliances like dryers or RVs, GFCIs protect you from getting zapped when there’s water around.

In every corner where moisture lurks or electronics mingle with liquid elements—these guardians stand watchful:

  • Outdoor spaces (patios, decks)
  • Bathrooms (near sinks)
  • Kitchens (countertops)

And that’s not all folks! Ever heard of an arc fault circuit interrupter? Think of it as GFCI’s cousin who steps in when sparks fly—literally—to prevent electrical fires before they start.

To wrap it up: whether you’re plugging in a toaster or taking a dip in your poolside hot tub after sunset—the right outlet matters—a lot! So next time you see that gfci outlet with its test/reset buttons or notice that smart split-circuit design in your kitchen—you’ll know exactly what superhero powers they hold.

Dual Voltage and Multi-Voltage Receptacles

Dual voltage receptacles support both 120V and 240V, essential for specific appliances. Multi-voltage receptacles accept plugs from various countries, offering versatility.

Recognize Dual Voltage

Look closely at your kitchen outlets. You might spot a receptacle with an extra slot or hole pattern. This isn’t just any outlet; it’s a dual voltage one. They’re like the Swiss Army knife of electrical outlets.

  • 120V/240V: These are the volt potentials.
  • Extra Slot: Marks it as dual voltage.
  • Hole Pattern: Differentiates from standard outlets.

These aren’t your run-of-the-mill power points. They’ve got something special going on: they can handle both 120 volts and 240 volts. That’s like being able to speak two languages fluently – pretty handy, right?

Know Multi-Voltage

Ever seen an outlet that looks ready to take on the world? That’s because multi-voltage receptacles are designed to accommodate plugs from multiple countries.

  • Universal Design: Fits plugs of varied shapes and sizes.
  • Travel Friendly: Ideal for jet-setters or international homes.

Imagine you’ve got friends coming over from all corners of the globe—London, Paris, Tokyo. With multi-voltage outlets, everyone can charge their gadgets without a hitch.

Essential for Appliances

Your morning routine probably involves some toast or a hot cup of joe, right? Well, those kitchen wizards—your oven and coffee machine—they often need dual voltage to do their magic.

  • Kitchen Appliances: Ovens often require 240 volts.
  • Power Demands: Higher volt potential caters to these needs.

Think about it this way: if your appliances were superheroes, then dual voltage is their superpower fuel that keeps them saving the day (or at least breakfast).

United States Standards

In the US, there’s a bit of variety when it comes to electrical outlets:

  • Vertical Slots: Commonly seen in 120-volt receptacles.
  • Horizontal Slot: Indicates ability for higher voltage use.

If you spot an outlet with one vertical slot and one horizontal slot plus a roundish hole below them—that’s the American version of saying “I can handle more than just your average lamp.”

Plug Types Matter

The prong cord you plug in also plays its part:

  • Two-prong cords fit snug into those vertical slots for regular ol’ 120 volts.

Got three prongs? The third guy—the round or flat one—teams up with that horizontal slot we talked about earlier to let electricity flow at a mighty 240 volts.

Smart Outlets in Modern Homes

Smart outlets revolutionize how we interact with our homes. They offer control and monitoring capabilities unheard of with traditional outlets.

Remote Control Access

Imagine turning off your coffee maker from bed. Or telling your lamp to switch on before you get home. That’s the magic of smart outlets. You can manage them using smartphone apps or voice commands. It’s all about convenience.

  • Use apps to turn devices on or off.
  • Voice assistants like Alexa or Siri enable hands-free control.

Energy Usage Tracking

Ever wonder how much juice your TV sucks up? Smart outlets give you the scoop. They monitor energy usage for every device they power. This data helps you cut down on electricity bills by identifying power hogs.

  • Track energy consumption in real-time.
  • Make informed decisions to save energy and money.

Home Automation Integration

Your home, smarter than ever. Some smart outlets can sync with home automation systems. This means you can schedule when appliances turn on and off, without lifting a finger.

  • Set timers for lights or heaters.
  • Automate tasks to match your daily routine.

Safety Features

Safety first, always! Smart outlets come with built-in features that help prevent electrical shocks and fires:

  • Automatic shut-off if a fault is detected.
  • Alerts sent to your phone if there’s unusual activity.

Types of Smart Outlets

Not all smart outlets are created equal. Here are some types you might find:

Wall Outlets

These replace traditional wall sockets and usually have USB ports too:

  • Charge devices directly without adapters.
  • Free up the plug for other appliances.

USB Outlets

USB outlets are perfect for tech-heavy areas like offices or kitchens:

  • No need for bulky charging bricks.
  • Keep wires tidy and out of sight.

Amp Outlets

Got powerful appliances? Amp outlets are designed for high-demand devices:

  • Ideal for large appliances like ovens or dryers.
  • Ensure safe operation without overloading circuits.

Combination Outlets

Why choose when you can have both? Combination outlets offer standard plugs and USB ports together:

  • Plug in multiple types of devices at once.
  • Great for spaces where versatility is key, such as kitchens or bedrooms.

In the world of electricity, one size does not fit all—especially. Understanding different types of electrical outlets ensures that whether it’s a heavy-duty power tool in the garage or a delicate smartphone in the bedroom, each gets just what it needs without any fuss—or nasty shocks!

Weather-Resistant and Tamper-Resistant Features

Weather-resistant outlets are designed for outdoor use, protecting against water. Tamper-resistant receptacles safeguard children from accidental shocks.

Weather-Proof Your Outlets

Outdoor electrical outlets face the wrath of Mother Nature. Rain, snow, and even garden hoses can spell disaster for standard outlets. But there’s a hero in this story: weather-resistant (WR) outlets. These champs have special covers that act as a shield against moisture intrusion.

  • Protection Against Elements: Each WR outlet has a durable cover.
  • Building Code Compliance: Many areas now require these for outdoor use.

Imagine you’re setting up your backyard for a party. You’ve got lights strung up and music ready to blast. But if those outlets aren’t weather-proof, one surprise shower could trip the breaker and kill the vibe.

Child-Safe Power Points

Curious kids and electricity are not the best mix. Tiny fingers love exploring, often poking things where they shouldn’t go—like into an outlet. Enter tamper-resistant (TR) receptacles—a parent’s best friend.

  • Built-In Safety: A barrier prevents objects other than plugs from being inserted.
  • Peace of Mind: Less worry about potential accidents involving children.

Think of TR outlets as bouncers at the club of electricity—they only let the right guests in (plugs). This means no more nightmares about junior jamming a fork into an outlet while you’re not looking.

Spotting Specialized Units

Now that you know about WR and TR outlets, how do you spot them? It’s simple—look for markings! These specialized units proudly wear their badges of honor: “WR” or “TR” stamped right on them.

  • Easy Identification: Look for “WR” or “TR” labels.
  • Combination Units Available: Some offer both features in one outlet.

You’re at the hardware store staring down an aisle of electrical tools and gadgets—it’s like finding Waldo to spot these marked units among the masses!

The Right Tools For Safety

These specialized units aren’t just fancy add-ons; they’re essential tools in building safety. They serve as barriers against hazards, whether it’s weather-related or child-induced mischief.

Having these safeguards is like having insurance—you hope you never need it but feel better knowing it’s there. Whether you’re upgrading your home or constructing a new building, incorporating WR and TR outlets is investing in peace of mind.

Ensuring Outlet Safety

Let’s face it, your home is more than just a roof over your head—it’s where the magic happens, from binge-watching your favorite series to whipping up a gourmet meal. But none of that is possible without a safe power supply. That’s why understanding the ABCs of electrical outlets is crucial for keeping you and your gadgets in tip-top shape. Remember, safety isn’t just another word in the dictionary; it’s the invisible shield that protects you from electrical mishaps.

So before you plug in your shiny new espresso machine or set up that high-tech gaming rig, take a moment to double-check those outlets. Are they up to code? Do they match your needs? If you’re scratching your head, maybe it’s time to call in an expert. And hey, if you’ve got questions or need help picking out the perfect outlet—give us a shout! We’re here to make sure that the only sparks flying in your home are those of joy and creativity.

FAQs

What should I consider when choosing an electrical outlet for high-powered appliances?

When selecting an outlet for high-powered appliances like dryers or ovens, ensure it has the appropriate amperage rating—usually 30A or 50A. It’s also important to match the outlet type with the appliance plug and consult with a licensed electrician for proper installation.

Can I replace my standard outlets with smart outlets myself?

If you’re handy and familiar with basic electrical work, replacing standard outlets with smart ones can be a DIY project—just remember to switch off power at the breaker box! However, if you’re unsure about anything, it’s safer (and smarter) to hire a professional electrician.

How often should I test my GFCI outlets?

It’s good practice to test GFCI (Ground Fault Circuit Interrupter) outlets monthly. Just push the “Test” button on the outlet—if it pops out and cuts power as intended, press “Reset” to restore power. If not, have it inspected by an electrician.

Are dual voltage receptacles necessary for travel adaptors?

Dual voltage receptacles are super handy if you’ve got gadgets from abroad—they can handle both 120V and 240V devices without needing bulky transformers. So yeah, they’re kind of like passports for your electronics!

Is there any advantage of having weather-resistant outlets outdoors?

Absolutely! Weather-resistant outlets have special covers that guard against moisture and debris—you wouldn’t want rain playing spoilsport while you’re blending margaritas poolside!

What makes tamper-resistant receptacles different from regular ones?

Tamper-resistant receptacles have built-in shutters that prevent foreign objects from being inserted into slots—a big win for peace of mind if curious kiddos are roaming around.

When should I upgrade my electrical outlets at home?

Consider upgrading if:

  • Your current ones look like relics from ancient times.
  • They don’t accommodate three-pronged plugs.
  • You need more functionality (like USB ports).
  • Or simply because safety standards have evolved—and so should your home!

Imagine stepping into a room where the glow of light from your fixture perfectly matches your mood, from vibrant to mellow, all thanks to a smart switch with way dimmer capabilities. Dimmer switches allow you to adjust the ambiance with ease. This is the magic that installing a new dimmer switch, a type of light switch, can bring to your space when wired to your light fixture and electrical box. Not only does it enhance the ambiance, but installing smart switch technology like a pole dimmer switch can lead to energy savings as you adjust light levels with a simple twist of a way dimmer to suit your needs. Upgrading to a dimmer smart switch gives any room an instant modern touch while letting you personalize lighting with ease, whether through a bulb adaptor or integrated into the wall plate to control electricity flow. Forget clunky old light switches; whether it’s a single-pole dimmer switch with a bulb adaptor for focused areas or a three-way dimmer for broader control, there’s no need to shy away from this DIY upgrade – even if you’re not an electricity whiz. Just ensure your wall plate is compatible and the neutral wire is properly connected.

Essential Tools for Dimmer Installation

Ready to tackle your dimmer switch project? You’ll need the right tools. From a trusty screwdriver set to a voltage tester equipped to check light switches, let’s ensure your electricity essentials are ready with the right gauge tools and a handy bulb adaptor in your kit!

Screwdriver Set Required

A screwdriver is like a trusty sidekick in this dimmer switch adventure, ensuring the bulb receives the right amount of electricity through each step, including handling the neutral wire. When installing a dimmer light switch, you’ll need both flathead and Phillips types because screws, especially those in metal fixtures, can be picky, and we want to earn their upvotes by taking the right step to keep them happy.

  • Flathead screwdrivers fit into single-slot screws.
  • Phillips screwdrivers are for cross-shaped slots.

Wire Strippers Needed

Stripping wires isn’t just about showing some copper—it’s crucial for making proper connections during the installation of a light switch or when replacing a bulb to ensure stable electricity flow. A wire stripper/cutter is your go-to tool here.

  • Strip insulation without nicking the wire.
  • Cut wires cleanly for precise work.

Voltage Tester Safety

Safety first! A voltage tester is non-negotiable when working with electricity during light switch installation or checking a neutral wire before changing a bulb. It tells you if the coast is clear or if there’s still electricity flowing through the light switch wires, even checking for a neutral wire before installation.

  • Check before touching any wire.
  • Confirm power is off every time.

Connectors and Tape

Wire connectors and electrical tape are like peanut butter and jelly—they make everything stick together, but in this case, it’s all about secure electrical connections when installing a light switch or handling electricity. Each step must ensure the neutral wire is safely connected.

  • Use connectors to join wires safely.
  • Wrap with electrical tape for extra security.

Safety Checks Before Installation Begins

Before diving into the nitty-gritty of installing a dimmer switch with a neutral wire, let’s zero in on safety and gather upvotes for our personal finance decisions. When installing a light switch, it’s crucial to ensure there’s no live wire lurking to zap you, that the neutral connection is secure, and that your eyes are shielded from any unexpected debris. Always prioritize personal finance by avoiding costly mistakes, and remember, safety upvotes are priceless.

Cut Power Supply

First things first, head over to the circuit breaker box to check the light switch, ensuring your personal finance discussions remain neutral and earn those upvotes. Before you flip the light switch and play electrician today, ensure you shut off the neutral power supply to the room, hoping for upvotes from your household’s safety inspectors. This isn’t just a “good idea”; it’s a neutral, non-negotiable stance unless you fancy a shocking surprise.

  • Locate the correct circuit breaker and flip it off.
  • Double-check that you’ve turned off the right one to maintain a neutral environment (we don’t want any mishaps, do we?).

Test for Electricity

Got your voltage tester handy? Great! Now, poke around those wires with it. You’re looking for a big fat zero here—no beeps, no lights, nada, completely neutral. That means you’re good to go.

  • Confirm absolutely no current is flowing through.
  • If there’s even a neutral hint of electricity, backtrack and figure out why.

Eye Protection

You might not think it looks cool, but slap on those neutral safety goggles anyway. Tiny bits of wire or dust can fly straight for your neutral peepers when you least expect it. Trust me; maintaining a neutral stance on eye safety is way cooler than an emergency trip to the doctor.

  • Keep those goggles on at all times during work.
  • No excuses – better safe than sorry!

Check Wire Condition

Now take a gander at those wires. Are they looking tired or frayed like they’ve had one too many late nights, remaining neutral in their expression? If so, hold your horses—you’ll need to address that before putting in your new dimmer switch.

  • Inspect each wire carefully for damage.
  • Frayed wires need fixing before proceeding further.

Remember how we talked about essential tools in the previous section? Well, now’s their time to shine! But only if everything checks out safe first. Your voltage tester just proved its worth by giving you the green light (or no light), and those goggles are sitting pretty on your face protecting those baby blues (or browns… I’m not judging).

Installing a dimmer switch isn’t rocket science but skipping these safety steps could make it seem like defusing a bomb – tense and possibly explosive! So do yourself a favor: check twice and install once. That way, when you’re basking in the adjustable glow of your handiwork later on, you’ll know it was all done without risking life and limb—or eyeball—for ambiance.

Steps to Remove the Old Switch

Before you dive into installing that sleek new dimmer switch, you gotta get rid of the old one. It’s not just yanking it out though; take note of how everything’s connected and keep those tiny screws in check for later.

Uncover the Wall Box

First things first, let’s get that wall plate off. Grab your screwdriver and gently unscrew it from the wall box. You’ll see the old switch peeking out, ready to say goodbye.

Detach Wires Carefully

Now, don’t go pulling wires like you’re starting a lawnmower. Ease them off the terminals of your old switch with care. Remember, these wires are about to be part of something smarter – your new smart switch!

Note Wire Configuration

Take a sec to eyeball how those wires are hooked up before they’re all free. Snap a pic with your phone or jot it down – trust me, it’s a lifesaver when hooking up your new dimmer.

Organize Screws and Parts

You know those tiny screws that always end up lost? Not today! Keep ’em organized – maybe in a cup or on some tape. If they’re still good, you can reuse them for installing the new switch.

Replacing an outdated light switch with a modern dimmer isn’t rocket science but does require attention to detail. After ensuring safety checks from our previous chat (you remember that part about turning off power at the breaker box, right?), let’s roll up our sleeves for some hands-on action.

When removing switches from their home in the wall box, patience is key. We’re not just talking about avoiding scratches on your wall paint here; we want to make sure every step is precise so that everything fits snugly back when we introduce our shiny new smart switch into its abode.

Here’s where things can get tricky: detaching those wires from their posts without turning them into an abstract art piece inside your wall box requires finesse and maybe even a little bit of elbow grease if they’re being stubborn.

And hey, while we’re getting intimate with our electrical setup here, let’s make mental (or actual) notes on which wire went where. Colors can deceive; what worked for the old switch might not fly with our high-tech newcomer.

Lastly — and this might seem like small potatoes but hear me out — keeping track of screws and other bits is crucial. Ever tried looking for a black screw on a dark carpet? Yeah… no fun! So let’s save future-you some frustration by stashing these pieces somewhere safe until it’s time to bring them back out.

Installing switches may seem daunting at first glance but breaking it down into steps makes it doable for even us mere mortals who aren’t electricians by trade. With each careful disconnect and meticulous note-taking session, we edge closer to bathing in that adjustable ambiance only dimmers can provide.

Wiring Your New Dimmer Correctly

Wiring a new dimmer requires matching wire colors and ensuring secure connections. Grounding is essential, and wires must be neatly tucked to prevent damage.

Match Wire Colors

When you’re hooking up your new dimmer, color coordination is key. Your house’s wiring probably has black, white, and maybe red or green wires. Here’s the lowdown:

  • Black wires are usually hot; they carry electricity from the breaker.
  • White wires are neutral and complete the electrical circuit.
  • Green or bare copper wires are ground wires for safety.

Make sure your new dimmer’s line wire connects to the black wire in your wall box. If there’s a red wire, that could be another hot wire—often found in 3-way switch setups.

Secure Wire Connections

Loose wires? No go! You gotta twist those wire ends together like they’re best friends. Then screw on a wire nut until it’s tight but not Hulk-tight—you don’t want to break anything.

  • Each pair of connected wires should get its own cap.
  • Give each nut a gentle tug to make sure nothing slips out.

The goal? A connection that won’t wobble even if you blast bass-heavy tunes next door.

Ground That Switch

If you spot a green or bare copper wire chilling in your wall box, that’s your ground buddy. Hook it up to the new dimmer’s ground wire or terminal—usually marked with green too. It’s like giving your electricity a safe path home if things go sideways.

No ground wire? Check what your local electrical code says about it. Safety first!

Tuck Wires Neatly

Cramming stuff into small spaces isn’t just for travel bags—it’s also for electrical boxes. But be gentle:

  • Fold the wires so they sit comfortably without crossing into no-no territory.
  • Avoid pinching—wires hate being squished as much as we do when our jeans shrink.

A tidy box means less chance of damaging insulation or causing shorts—and nobody wants an unexpected light show!

Remember: dealing with electricity can get dicey if you’re not careful with voltage and such. Always turn off power at the breaker before starting work on wiring projects. And if neutral wiring or any other part of this feels over your head, call in a pro electrician who knows their joules from their coulombs!

Troubleshooting Common Installation Issues

Got your dimmer switch installed but hit a snag? Sometimes things go sideways, and lights start acting up or the switch doesn’t work at all. But don’t sweat it; with a few checks and tweaks, you can sort out most issues on your own.

Check Connections First

Installed that dimmer and now it’s giving you the silent treatment? Before you throw in the towel, ensure every wire is snugly connected. A loose wire is like an untied shoelace – it’ll trip you up every time. Double-check that:

  • The black wires from the dimmer are firmly attached to your wall wires.
  • Ground connections aren’t just hanging there but are properly secured.

Flickering Lights Alert

Lights flickering like a spooky movie scene? It’s not ghosts; it’s probably just a mismatch between your bulbs and dimmer. Dimmers need the right kind of bulb to play nice. If they’re incompatible, you get a light show you didn’t ask for. Remember:

  • LED bulbs should be ‘dimmable’ to work well with dimmers.
  • Old-school incandescent bulbs usually don’t fuss about dimmers.

Buzzing Sounds Decoded

Hearing a buzz every time you use the switch? That’s your cue that something’s off. It could be telling you “Hey buddy, I’m not feeling this bulb.” Or maybe it’s saying “This wattage is cramping my style.” Stick to these tips:

  • Match the wattage requirements of your dimmer with your light bulbs.
  • Swap out bulbs if they’re not meant for dimming – yes, even if they’re brand spanking new.

Dead Switch Diagnosis

Switched on but nothing’s happening? You might have tripped the circuit during installation or landed yourself a dud unit. Here’s what to do:

  1. Head over to your breaker box and look for any flipped switches.
  2. Flip them back firmly (but don’t play ping pong with them).
  3. Still no luck? Test another device in the same outlet to rule out a faulty switch.

If everything else fails, calling in a pro isn’t admitting defeat – it’s being smart about electrical safety.

Installing a dimmer switch should be smooth sailing when done right. But if trouble comes knocking, these pointers will help keep frustration at bay and lead you toward that sweet spot where ambiance and functionality meet.

Remember: With great power (literally) comes great responsibility—always prioritize safety when dealing with electricity!

Finalizing and Testing Your Dimmer

After sorting out common installation hiccups, it’s time to anchor your dimmer switch snugly into the wall box. Make sure everything looks neat and tidy before bringing back the juice.

Secure Wall Box Mount

First things first, you’ve got to get that dimmer switch in place. And I mean straight as an arrow because no one likes a wonky switch! Use a screwdriver to tighten it up but don’t go Hulk on it – just snug enough so it doesn’t wiggle around.

Reattach Faceplate

Next up, pop that faceplate back on. It’s like putting the icing on a cake – makes everything look good. Plus, it protects all those wires you just connected. Line it up nice and easy, then secure it with its screws.

Restore Power

Alright, moment of truth time! Head over to your circuit breaker and flip that power back on. No sparks or pops should happen if you’ve done everything right so far.

Test Functionality

Now for the fun part – testing! Give that knob or slider a gentle nudge and watch as your lights obey your every command. You’re looking for smooth transitions from bright to mood lighting here.

  • Turn the knob slowly.
  • Watch how the light reacts.

If all’s well, you’ve just leveled up your home lighting game!

Monitor Performance

Keep an eye on your new setup during those first few hours of use:

  • Feel for any excess heat.
  • Look out for flickering or inconsistent light levels.

If something seems off, don’t ignore it – better safe than sorry!

Voltage Tester Check

Don’t forget about safety checks with your voltage tester:

  1. Touch the tester to the screws holding wires.
  2. Ensure there’s no current when off.
  3. Verify proper operation when on.

This little tool is your best bud for making sure everything’s A-okay electricity-wise.

Lighting Considerations

It’s not just about dimming; different bulbs react differently:

  • LEDs need compatible dimmers.
  • Incandescents are usually more forgiving.
  • Halogens fall somewhere in between.

Make sure you’re using bulbs that play nice with your new dimmer switch setup!

Wrap-Up and Safety Recap

You’ve done it! Your new dimmer switch is installed, and it’s time to bask in the glow of your handiwork. But before you pat yourself on the back, let’s quickly recap on safety—because no one wants their bright day darkened by an electrical mishap. Always make sure power is off at the breaker box before poking around in those wires. Double-check your connections are snug as a bug, and there’s no exposed wiring that could cause trouble down the line.

Now for the fun part: adjusting your ambiance with just a slide or a tap. If you hit any snags along the way or if something doesn’t feel quite right, don’t hesitate to call in a pro. Remember, DIY is dandy, but safety’s not just another word—it’s your peace of mind. And hey, why keep this illuminating experience to yourself? Share your newfound dimmer-switch savvy with friends and family; they might just see you in a whole new light!

FAQs

What tools do I need to install a dimmer switch?

To install a dimmer switch successfully, you’ll need some basic tools like a screwdriver, wire stripper/cutter, voltage tester, and needle-nose pliers. It’s also wise to have wire connectors and electrical tape handy.

Can I install any type of dimmer switch with my existing light bulbs?

Not all light bulbs are compatible with all types of dimmer switches. Check if your bulbs are dimmable—LEDs especially require specific types of dimmers. Always verify compatibility between your bulbs and the new dimmer switch to avoid flickering or damage.

Is it safe for me to install a dimmer switch myself?

If you’re comfortable with basic home improvement tasks and follow safety procedures (like turning off power from the main circuit), installing a dimmer can be safe. However, if you’re unsure about anything electrical-related or encounter complex wiring issues during installation, contact an electrician.

How do I troubleshoot my newly installed dimmer if it isn’t working properly?

Firstly check that all wires are connected correctly according to the manufacturer’s instructions and that none are loose. Ensure that your light bulbs are compatible with your new dimmer switch. If problems persist after double-checking these elements, consult an electrician.

Will installing a new dimmer affect my electricity bill?

Dimming lights typically reduces their energy consumption which can lead to savings on your electricity bill over time. The actual impact will depend on how much you use the lights and how often they’re kept at reduced brightness levels.

Can I use smart bulbs with my new dimmer switch?

Some smart bulbs have built-in dimming functions that may not be compatible with external wall-mounted dimmers. To avoid conflicts or potential damage check both products’ specifications for compatibility information before using them together.

What should I do if my old switch has more wires than my new dimmer?

If there’s an extra wire (usually red) present in your old setup that doesn’t fit into your new one it could be part of a three-way circuit setup where two switches control one light source from different locations—if this is outside of what was covered today definitely reach out to an expert electrician for help rather than risking incorrect installation.

As Thomas Edison once illuminated, “We will make electricity so cheap that only the rich will burn candles.” Yet, even with such progress, homeowners must tread carefully with the powerful force of electrical hazards at their fingertips. Ensuring electrical cords are safely managed, lights are properly installed, and electrical outlets are not overloaded is essential for safety. Recognizing outdoor electrical hazards such as downed power lines isn’t just smart—it’s essential for adhering to safety tips and keeping your home and family safe. Ensuring circuit breakers are functioning properly is also a key part of this process. Quick actions like weatherproofing outlets and arming yourself with safety tips can shield you from the shock of unforeseen electrical hazards, such as faulty electrical cords and malfunctioning appliances. Prioritize safety with electrical cords and let knowledge empower your every move when handling electrical equipment near electrical outlets to prevent electrical shock, especially with outdoor electricity.

From sunny backyard barbecues illuminated by festive lights to stormy nights with power lines humming in the wind, your home’s exterior in any state faces elements that demand respect and caution. Ensure your outdoor celebrations are safely powered by using power strips designed for exterior use. Understanding how to navigate these challenges ensures peace of mind as you harness the energy that powers our lives and lights under the open sky.

Risks Unique to Outdoor Electrical Systems

Outdoor electrical systems, including power lines and lights, face unique challenges, like weather-induced wear and the presence of wildlife. These factors, including compromised lights and vulnerable power lines, can significantly increase the risk of damage and safety hazards for homeowners.

Exposure to Elements

Outdoor circuits endure rain, heat, and cold. This leads to corrosion—a silent destroyer of electrical safety. Think about it: your outdoor outlets and lights are like athletes out in the field, constantly getting hit by nature’s curveballs.

  • Corrosion-resistant materials are a must.
  • Regular inspections catch early signs of wear.

Overhead Power Dangers

Kites flying high can turn grim if they meet power lines and entangle with lights. Trimming trees near these lines? That’s playing with fire—literally. Homeowners should treat overhead power lines as live wires ready to strike.

  • Always keep ladders and tools away from power lines.
  • Educate kids on the dangers of climbing near these lines.

Ground Faults Outdoors

Moisture loves meddling with electricity outdoors, creating ground faults. It’s like water sneaking into places it shouldn’t be—trouble waiting to happen. Proper grounding is your best defense against this sneaky intruder.

  • Install Ground Fault Circuit Interrupters (GFCIs) for protection.
  • Test GFCIs monthly; they’re your moisture watchdogs.

Wildlife Wreaking Havoc

Squirrels might look cute until they chew through your wiring. Birds nesting on electrical boxes? They don’t pay rent or respect your property’s electrical integrity.

  • Use animal guards to protect exterior fixtures.
  • Inspect for nests or damage regularly as part of maintenance routines.

In essence, managing an outdoor electrical system is a bit like being a zookeeper mixed with a weather forecaster—you have to be prepared for animals and storms alike! By staying vigilant and proactive about potential risks, homeowners can ensure their outdoor spaces remain both enjoyable and safe from electrical mishaps.

Safeguarding Equipment for Outdoor Use

Outdoor electrical safety is crucial for homeowners. Implementing the right measures can protect both equipment and family.

Utilize GFCIs Everywhere

GFCIs are lifesavers, literally. They cut power when they sense an imbalance, preventing shocks. Every outdoor outlet should have one. Especially where water sources like pools and sprinklers are nearby. It’s a non-negotiable upgrade for modern homes.

  • Install in areas prone to wetness
  • Test monthly to ensure functionality

Rated for Exterior Use

Not all gadgets are built tough enough for the outdoors. Check labels on outdoor lighting, power tools, and devices before buying. Look specifically for ‘rated for exterior use’. This means they’re designed to withstand Mother Nature’s mood swings.

  • Lights that endure rain or snow
  • Power tools that handle temperature changes

Weatherproof Covers

Weatherproof covers shield your outlets from extreme weather. They’re like umbrellas for your electrical points! When you’re not using them, keep them covered up tight.

  • Prevents water from causing short circuits
  • Keeps debris out when outlets lie idle

Secure Loose Wires

Loose wires aren’t just ugly; they’re tripping hazards waiting to happen. Whether it’s backyard beautification or playing kids’ safety, securing cables is key.

Preventative Measures Against Electrical Accidents

Outdoor electrical safety is crucial for homeowners. It involves being mindful of hazards and taking steps to prevent accidents.

Ladders and Overhead Lines

Always be aware of overhead power lines when using ladders. A simple rule: keep all equipment at least 10 feet away. This distance acts as a safety buffer, reducing the risk of accidental contact.

Educate Your Family

Knowledge is power, especially with electricity. Make sure your family knows to stay clear of substations and transformers. These areas are high-voltage zones and not places for play.

Insulated Tools Usage

DIY can be rewarding but also risky with electricity involved. Use insulated tools to protect against unexpected shocks. They’re designed to reduce the flow of electric current if they touch live components.

Main Breaker Protocol

Before you start any repairs outdoors, remember this step. Always turn off the power at the main breaker first. This action cuts off electricity supply, making it safer to work on electrical issues.

Here’s how you can apply these tips:

  • For Ladder Safety:
  • Check for overhead lines before positioning your ladder.
  • Choose fiberglass ladders over metal ones—they don’t conduct electricity.
  • Educational Tips:
  • Walk around your property with family members pointing out danger zones.
  • Place warning signs near substations or transformers as reminders.
  • When Using Tools:
  • Invest in a set of quality insulated tools for outdoor projects.
  • Regularly inspect them for wear and tear that could compromise their insulation.
  • Handling Circuit Breakers:
  • Label your main breaker clearly so everyone knows where it is.
  • If unsure about how to safely turn off power, consult a professional electrician.

Safe Management of Wet Outdoor Appliances

Outdoor appliances and water are a risky combo. Keep them dry, and power down if they get wet.

Never Touch with Wet Hands

You know that feeling when you’re fresh out of the pool or just finished washing your car? Your hands are all wrinkly and, well, soaking wet. That’s exactly when you shouldn’t even think about touching any outdoor electrical appliance. It’s like inviting trouble to a party at your house.

Water conducts electricity super well. So, if you grab an appliance with wet hands, you might as well be handing over an invite for an electric shock. And trust me, that’s one guest you don’t want showing up.

Store in Dry Areas

Appliances hate getting damp; it makes them cranky and prone to throwing tantrums in the form of sparks or even fires. So after using that leaf blower or hedge trimmer, give ’em a cozy, dry spot away from any chance of rain or sprinklers going rogue.

  • Find a shed or garage shelf.
  • Cover them up if they have to chill outside.

This isn’t just about being tidy; it’s about keeping things safe so your tools won’t overheat or short-circuit next time you use them.

Disconnect If Submerged

Picture this: You’re jamming out to some tunes while hosing down the patio and oops—your speaker takes a dive into the kiddie pool. Instinct might scream “Grab it!” but hold up! Before you turn into a hero, kill the power at the source first.

  • Unplug from the outlet.
  • Flip off any connected breakers.

Only then can you fish out your sunken electronic treasure without risking a shocking experience—literally.

Retrieval Safety Steps

Let’s say disaster strikes and your blender decides to take swimming lessons during an epic backyard BBQ bash. Here’s what not to do: Don’t jump in after it like it’s drowning! Instead:

  1. Cut off power immediately.
  2. Get everyone clear from danger zones.
  3. Call in a pro if needed because safety comes first!

Remember these steps and avoid turning your cookout into a blackout—or worse.

Guidelines for Secure Extension Cord Usage

Outdoor electrical safety is crucial, and using extension cords properly is a key part of it. Ensure they’re outdoor-rated and can handle the power load to avoid hazards.

Outdoor-Rated Cords Only

When you need to use extension cords outside, don’t just grab any old cord from the garage. You gotta make sure it’s made for outdoor action. These cords are tough cookies, built to stand up against rain, snow, and even that blazing sun.

  • Look for labels or markings that say “Suitable for Outdoor Use.”
  • Check the wattage rating to match with your devices’ needs.

Avoid Hazardous Placement

Running cords willy-nilly across the yard? Bad move. You’re setting up a tripping marathon or lighting the fuse for a fire hazard without even knowing it.

  • Keep cords out of areas where people walk.
  • Never hide them under rugs; that’s asking for trouble.

Regular Cord Check-Ups

Before you plug in anything, give your extension cord the once-over. Frayed or naked wires? That’s an accident waiting to happen! It’s like riding a bike with flat tires – not gonna end well.

  • Inspect for damage before each use.
  • Look out for cracks or cuts in insulation.

Post-Use Storage

After finishing up your outdoor gig, don’t leave your cords lying around. Sunbathing isn’t good for them! Tuck them away inside where they’re safe from Mother Nature’s mood swings.

  • Unplug when not in use.
  • Store indoors to dodge weather wear-and-tear.

Routine Inspections for Preventive Maintenance

Outdoor electrical safety is crucial for every homeowner. Regular check-ups and proper maintenance can prevent hazards.

Secure Outdoor Lighting

Outdoor lighting ensures safety after dark, but it needs attention too. Check fixtures regularly to keep things bright and safe. Look for loose fittings or damage that could spell trouble. If a light wobbles or has cracked glass, fix it pronto.

  • Loose fittings can lead to exposed wires.
  • Damaged fixtures might let water seep in, causing shorts.

Test Your GFCIs

Ground Fault Circuit Interrupters (GFCIs) are your best pals in preventing shocks. They’re often found in areas that might get wet—think patios or garages. Testing them is a cinch; just press the test/reset buttons once a month.

  • If they don’t respond, call an electrician.
  • Unresponsive GFCIs are like broken seatbelts—they won’t protect you when needed.

Watch for Discoloration

Outlets and switch plates should never look like they’ve got a tan. Discoloration often means something’s heating up behind the scenes, which isn’t good news.

  • Overheating issues can lead to fires.
  • Replace any outlet that looks more toasted than your morning bagel.

Yearly Electrician Visits

Even if you’re handy, some things are best left to pros with tools and know-how. Schedule a yearly visit from a licensed electrician to give your system the thumbs-up.

  • They’ll spot issues you might miss.
  • A pro can ensure everything’s running as it should be.

Mitigate Outdoor Electrical Hazards

Outdoor electrical safety isn’t just about dodging a shock; it’s about keeping your home and family safe from potential hazards that could turn a backyard barbecue into a call to emergency services. Remember, electricity is like a wild horse—it’s powerful and can get out of control if not handled with care. By following the tips we’ve discussed, you’re putting up the fences that keep this stallion in check. Keep your outdoor gear dry, use extension cords wisely, and don’t let those routine checks slide off your to-do list.

Now, don’t just read this and forget about it—take action! Start today by giving your outdoor electrical systems the once-over. And hey, if you’re not sure what you’re looking for or how to fix it, call in a pro. There’s no shame in asking for help; it’s way better than getting zapped or starting an unintended firework show in your backyard. Stay safe and power on!

FAQs

What kind of extension cord should I use outdoors?

For outdoor use, always choose an extension cord that’s rated for outdoor use—look for one labeled ‘outdoor’ or ‘all-weather.’ These cords are designed to withstand moisture, temperature changes, and exposure to sunlight without deteriorating.

How often should I inspect my outdoor electrical appliances?

You should give all your outdoor electrical appliances a visual inspection at least every season or before each use if they are used infrequently. Look out for frayed wires, signs of wear and tear, or damage from weather conditions.

Can I leave my outdoor electrical equipment out in the rain?

Nope! Water and electricity are a dangerous combo. Always store your electrical equipment indoors when it rains or cover them with waterproof covers designed specifically for them.

Is it safe to fix an outdoor electrical problem myself?

If you’re not trained in handling electrical repairs, it’s best to steer clear of DIY fixes. Call a licensed electrician instead.

What should I do if an outdoor appliance gets wet?

Unplug it immediately—if safely possible—and don’t use it until it has been thoroughly dried out. If there’s any doubt about its safety post-wetting incident, have it checked by an expert before using again.

Are GFCI outlets necessary outdoors?

Absolutely! Ground Fault Circuit Interrupters (GFCI) outlets are crucial outdoors as they automatically cut off power when they detect an imbalance in current flow which could indicate a dangerous situation like water exposure or line damage.

How can landscape lighting affect my home’s safety?

Properly installed landscape lighting can enhance security by illuminating dark areas where intruders might hide. However, incorrect installation could lead to tripping hazards or create fire risks due to overheated fixtures or exposed wiring.

©2024 Champion Services All Rights Reserved